
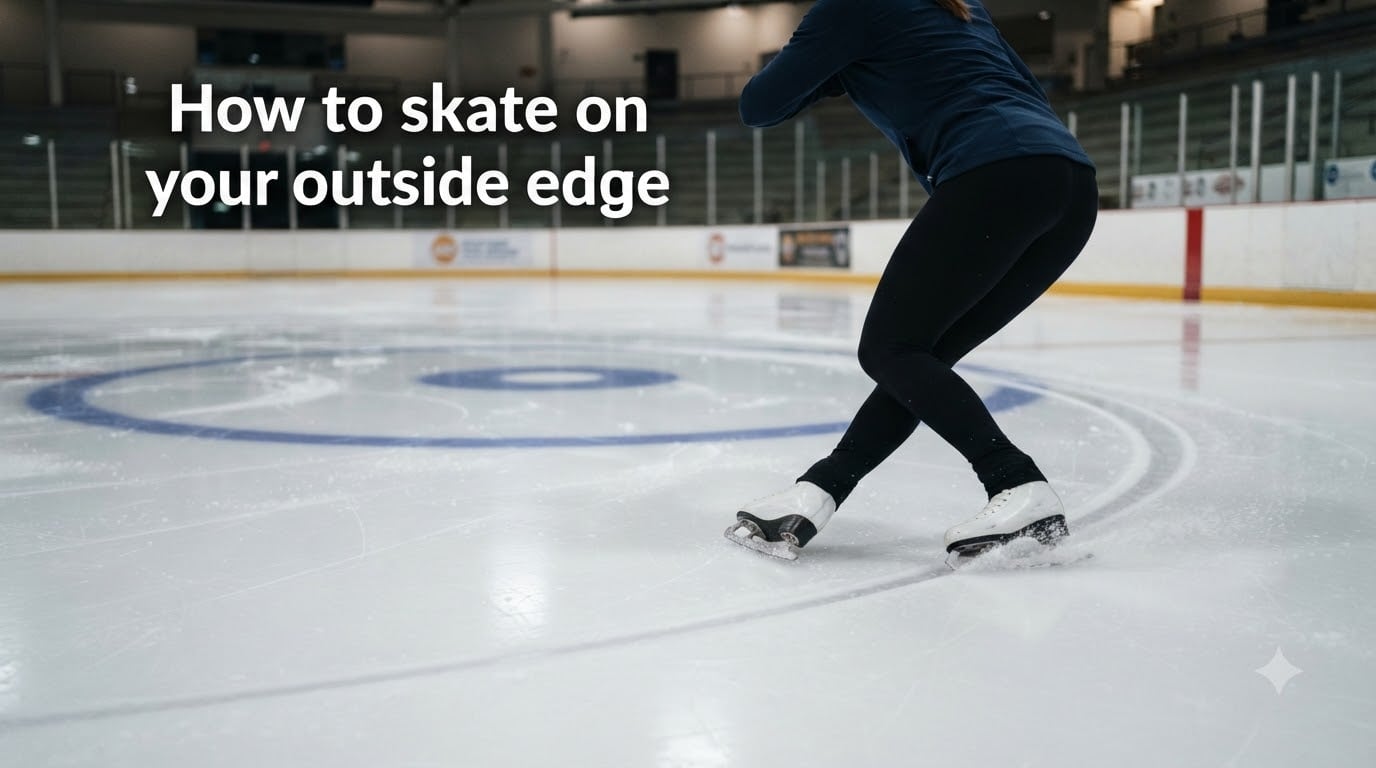
When you first lace up your skates, there is a decent chance you spend most of your time balanced on the inside edges of your blades. That is completely normal — it is the edge that feels safe and natural because your body weight tends to fall there. But if you want to stop relying on hockey stops with your inside edge only, want tighter turns, or just want to stop looking like a beginner on the ice, you need to learn how to skate on your outside edge.
Outside edge control separates confident skaters from people who look stiff and tentative on the ice. Once you can trust your outside edge, you open up the ability to do crossovers with real power, sharp turns, three-turns, and smooth transitions. Whether you play hockey, figure skate, or just skate for fun, this guide will walk you through how to find, feel, and control your outside edge from the ground up.
I have broken this down into clear sections covering what the outside edge actually is, how it should feel, step-by-step technique, beginner drills, troubleshooting the most common mistakes, off-ice exercises, and an 8-week progression plan. By the end, you will understand how to skate on your outside edge with real confidence.
Table of Contents
What Is an Outside Edge in Skating?
Your skate blade has two edges: an inside edge and an outside edge. The inside edge is the one closest to the center of your body — the side that faces your other foot. The outside edge is the one on the far side of each blade, the side that faces away from your body.
When you stand with both feet flat and parallel, you are balancing on the bottom of the blade without really committing to either edge. When you tilt your foot inward (knock-kneed), you engage the inside edge. When you tilt your foot outward (bow-legged), you engage the outside edge. The blade has a curved hollow ground into the middle, called the blade hollow, which creates two sharp edges separated by a groove.
That hollow is what gives you grip on the ice. A deeper hollow means more bite and a sharper edge, which some beginners find easier to feel. A shallower hollow glides faster but feels less secure until you build confidence.
Skating coaches use abbreviations for the four edges: Right Forward Outside (RFO), Left Forward Outside (LFO), Right Backward Outside (RBO), and Left Backward Outside (LBO). The same four exist for inside edges, giving eight total edges. This guide focuses on the outside four, but the principles apply to all of them.
Inside vs Outside Edge: Key Differences
The main difference between inside and outside edges comes down to the direction you lean and which side of the blade grips the ice.
On an inside edge, you lean toward the center of your body. The pressure goes to the arch-side of your foot, and you curve toward the inside. On an outside edge, you lean away from your body center. The pressure shifts to the little-toe side of your foot, and you curve toward the outside.
Most beginners default to inside edges because that is where balance naturally sits. Your weight falls inward when you are nervous, your knees tend to buckle inward, and the inside edge feels like the safe option. Outside edges require you to actively tilt against that natural instinct.
Here is a quick comparison to help you tell them apart:
Inside edge: Weight on arch side, body leans inward, used for basic forward stroking, inside crossovers, and snowplow stops.
Outside edge: Weight on little-toe side, body leans outward, used for tight turns, outside crossovers, three-turns, jumps, and outside edge hockey stops.
Feel difference: Inside edges feel stable and supported. Outside edges feel exposed and require more ankle strength and trust.
Curve direction: Inside edge curves toward your body center. Outside edge curves away from your body center.
Understanding this difference is the foundation for everything that follows. If you cannot tell which edge you are on, you are not ready to control it yet.
How Outside Edges Should Feel on Your Feet
One of the biggest hurdles beginners describe on skating forums is that they cannot feel the difference between their edges. The outside edge has a distinct sensation once you know what to look for.
When you are on a proper outside edge, you will feel pressure shift to the outer side of your skate boot — the side near your pinky toe. Your ankle will be slightly inverted, meaning the sole of your foot angles inward while the outer edge of the blade digs into the ice. Your knee should be deeply bent and tracking over or slightly outside the toe of your skate.
You will also feel a curve. An outside edge does not glide in a straight line. It traces a curve that arcs away from the center of your body. If you push off and just stand on one foot on an outside edge, you will naturally carve a half-circle into the ice. That curve is proof you are on the edge.
If you feel nothing — no tilt, no curve, no pressure on one side — you are probably gliding on the flat of the blade. That is not an edge at all. The goal is to commit to the tilt so the edge actually engages.
How to Get on Your Outside Edge: Step-by-Step
Here is the technique for getting onto a forward outside edge. Follow these steps in order and practice each one until it feels natural before moving to the next.
Step 1: Start from a standstill on the boards. Hold the wall with one hand and stand on one foot. Practice tilting your skate outward so you feel the outside edge engage. Get comfortable with the ankle tilt before you add speed.
Step 2: Bend your skating knee deeply. A deep knee bend is non-negotiable for outside edges. If your leg is straight, your center of gravity is too high and you will not be able to lean without falling. Aim for your skating knee to bend until your thigh is at least parallel to the ice.
Step 3: Push off and glide on one foot. Use your other foot to push off gently and then lift it slightly off the ice. Do not rush — a slow glide gives you time to feel the edge.
Step 4: Tilt your ankle outward. This is the moment of commitment. Slowly invert your ankle, rolling your foot so the outside edge presses into the ice. Think of it as trying to show the inside of your boot to the person next to you.
Step 5: Press your weight into the outside edge. Shift your body weight over the engaged edge. Your hip on the skating side should drop slightly toward the ice. Keep your upper body tall but relaxed — do not hunch.
Step 6: Let the curve happen. Do not fight it. The outside edge will naturally carve a curve. Follow that curve and let it carry you. The arc is proof you are doing it right.
Step 7: Hold for 3 to 5 seconds, then step down. Try to hold the edge for a count of three. If you wobble, that is fine — just regroup and try again. Over time, aim for longer holds.
Step 8: Repeat on the other foot. Most people have a strong side and a weak side. Do not neglect the weaker one — it usually needs more reps to catch up.
Best Outside Edge Drills for Beginners
Drills are where you turn understanding into muscle memory. These are the ones I recommend based on what coaches and experienced skaters consistently suggest on forums.
Drill 1: Wall-Supported Outside Edge Holds
Stand at the boards, hold the wall, and lift one foot. Tilt onto the outside edge of your standing foot and hold for 10 seconds. Switch feet. Do 5 holds per side. This builds ankle strength and gets you comfortable with the tilt in a safe position.
Drill 2: Single-Foot Outside Edge Glides
Push off from the boards and glide on one foot on an outside edge. Let it curve. Do not try to go fast — control is more important than speed. Aim to hold each glide for 3 seconds, then 5, then 10 as you improve.
Drill 3: Forward Slaloms (S-Curves)
Skate forward and gently shift from outside edge to inside edge on alternating feet, creating an S-pattern on the ice. This drill teaches edge transitions and helps you feel the difference between inside and outside on each foot.
Drill 4: Circle Edges on Hockey Circles
Find a face-off circle painted on the ice. Skate around the circumference on one foot, using your outside edge on the outside of the circle. This is one of the most popular drills recommended by coaches because it gives you a visual guide for your curve.
Drill 5: Backward Outside Edge Glides
Once forward outside edges feel comfortable, try the backward version. Start by pushing off backward and gliding on one foot with the ankle tilted outward. Backward outside edges are harder because you cannot see where you are going, so start slow and wear protective gear if you are nervous.
Drill 6: Figure Eights
This is a classic figure skating drill. Push off on one outside edge, let it trace a circle, then push off on the other foot’s outside edge to trace a circle in the opposite direction. The goal is two clean circles that form a figure eight. This takes weeks to master but is the gold standard for outside edge control.
Common Outside Edge Mistakes and How to Fix Them
Almost every beginner struggles with the same set of problems. Here are the most common mistakes and how to correct them.
Mistake 1: Weight stays on the inside edge during turns.
This is the number one complaint on skating forums. The fix: consciously commit to the ankle tilt before you enter the turn. If you wait until you are already turning, your body will default to the inside edge out of habit. Set the edge first, then turn.
Mistake 2: Not bending the knee enough.
A straight leg makes outside edges nearly impossible. Your center of gravity is too high, and you cannot lean without tipping over. Fix: drop into a deeper knee bend than feels necessary. When in doubt, bend more.
Mistake 3: Looking down at your feet.
Looking down shifts your weight forward and kills your balance. Fix: pick a point at eye level across the rink and look at it while you skate. Your head is heavy — where it goes, your body follows.
Mistake 4: Hunching your shoulders.
Tension in your upper body makes everything harder. Fix: keep your shoulders down and relaxed. Your chest should be open and your arms in a natural position — not flailing, not pinned to your sides.
Mistake 5: Fear of falling prevents commitment.
This is the psychological barrier no competitor talks about. You know intellectually that you need to lean, but your body refuses because it feels like falling. Fix: practice near the boards so you can catch yourself. Wear padded shorts or knee pads if it helps you commit. The fear fades with repetition.
Mistake 6: Trying to go too fast.
Speed magnifies mistakes. A wobble at low speed is nothing; a wobble at high speed can be a hard fall. Fix: master the edge at a slow glide first. Speed comes naturally once the technique is solid.
Mistake 7: Neglecting the weak side.
Everyone has a dominant side. The non-dominant side always feels awkward, so people avoid it. Fix: always do extra reps on your weak side. It will catch up faster than you think if you give it attention.
Off-Ice Exercises to Build Outside Edge Strength
One of the biggest content gaps among competitors is the lack of off-ice training guidance. You can build the strength and balance you need for outside edges without ever stepping on the ice. These exercises target the specific muscles and movements involved.
Exercise 1: Single-Leg Balance
Stand on one foot on a flat surface for 30 seconds. Then close your eyes and try again. This builds the ankle stability and proprioception you need for single-foot edge holds. Do 3 sets per leg.
Exercise 2: Ankle Inversions with Resistance Band
Sit on the floor with a resistance band looped around your foot. Slowly invert your ankle (roll it outward) against the band’s resistance, then return to neutral. This strengthens the muscles that tilt your foot onto the outside edge. Do 3 sets of 15 reps per foot.
Exercise 3: Balance Board or Wobble Board
Stand on a balance board and practice holding your balance with your weight shifted to the outer edge of each foot. This directly mimics the ankle position needed for outside edges and trains the stabilizer muscles around the ankle.
Exercise 4: Calf Raises on an Edge
Stand on the edge of a step with your heels hanging off. Rise onto your toes, then lower below the step level. Strong calves and ankles are essential for edge control. Do 3 sets of 20.
Exercise 5: Lateral Lunges
Step sideways into a lunge, keeping your knee tracking over your toe. This builds the hip and thigh strength needed to hold a deep knee bend on an outside edge. Do 3 sets of 10 per side.
Spend 10 to 15 minutes on these exercises three times per week. Within a few weeks, you will notice a real difference in how stable your ankles feel on the ice.
Beginner Progression Timeline: Week 1 to Week 8
One thing missing from most guides is a realistic timeline. Here is what you can expect if you practice outside edges for 20 to 30 minutes per session, two to three times per week.
Week 1-2: Wall-supported outside edge holds. Goal: feel the tilt and get comfortable with the sensation. You will wobble a lot — that is normal.
Week 3-4: Single-foot outside edge glides from a slow push-off. Goal: hold the edge for 3 seconds. Start tracing a visible curve on the ice.
Week 5-6: Forward slaloms and hockey circle drills. Goal: smoothly transition between inside and outside edges. Your weak side will still feel rough.
Week 7-8: Backward outside edge glides and basic figure eights. Goal: hold backward outside edges for 3 seconds and trace clean circles on both sides.
Everyone progresses at a different rate. Some skaters nail forward outside edges in two weeks; others need two months. The key is consistent, focused practice — not just skating around the rink aimlessly.
How Outside Edges Connect to Crossovers, Turns, and Stops
Outside edges are not an isolated skill. They are the foundation for most advanced skating techniques.
In crossovers, your outside foot rolls onto its outside edge as it crosses over the inside foot. Without outside edge control, crossovers feel clumsy and lack power. In tight turns, your inside foot uses the outside edge to grip and carve — this is exactly where beginners fail because their weight defaults to the inside edge.
For three-turns, you start on one edge and rotate onto the opposite edge on the same foot. The forward outside three-turn is one of the first edge-change skills figure skaters learn. For stops, the outside edge hockey stop requires you to shave the ice with the outside edge of your leading skate — a skill that demands confidence and quick edge commitment.
Mastering outside edges makes every other skating skill better. It is not an optional technique for advanced skaters — it is the core of controlled, efficient skating.
Frequently Asked Questions
What can I do at the rink or away from the rink to get more comfortable trying to skate on outside edges?
At the rink, practice wall-supported outside edge holds along the boards, then progress to slow single-foot glides. Away from the rink, do single-leg balance exercises, resistance-band ankle inversions, and balance board work to build the ankle strength and stability you need. Consistency matters more than duration — 15 focused minutes three times per week beats one long unfocused session.
How do I lean on my outside edge?
Bend your skating knee deeply, push off into a one-foot glide, then slowly tilt your ankle outward so the outer edge of the blade engages the ice. Shift your body weight over that edge and let your hip drop slightly toward the ice. Do not rush the lean — commit gradually and let the edge carve its natural curve.
Why can’t I get on my outside edge during turns?
The most common reason is that your body defaults to the inside edge out of habit and fear. You need to consciously set the outside edge before entering the turn, not during it. A shallow knee bend and looking down also prevent proper lean. Try bending deeper, setting the edge early, and practicing turns slowly near the boards until you build trust.
Why is my outside edge weak?
A weak outside edge usually comes from a combination of underdeveloped ankle strength, insufficient knee bend, and lack of practice on the non-dominant side. Do off-ice ankle strengthening exercises, practice edge holds at the wall, and give extra reps to your weaker foot. A blade hollow that is too shallow can also make edges feel less secure — talk to your sharpener about a slightly deeper hollow.
How do I practice outside edges alone?
You can practice outside edges solo using hockey circles painted on the ice as guides. Start with wall-supported holds, move to single-foot glides that trace a curve, then progress to slaloms and circle edges. Off-ice, single-leg balance and resistance-band exercises can be done at home with no equipment beyond a band.
You Now Know How to Skate on Your Outside Edge
Learning how to skate on your outside edge is one of those skills that changes everything about your skating. It turns stiff, tentative gliding into smooth, controlled movement. It unlocks crossovers, tight turns, stops, and eventually jumps and three-turns.
The process is straightforward even if it is not easy. Understand what the outside edge is, learn how it should feel, practice the step-by-step technique, run the drills, fix the common mistakes, and build strength off the ice. Follow the 8-week progression timeline and you will see real improvement.
Remember that everyone starts stuck on their inside edges. The fear of falling on an outside edge is universal — it is not a sign that you cannot do it. Start at the boards, bend your knees deeper than you think you need to, commit to the tilt, and let the edge carve its curve. The more reps you put in, the more natural it becomes.
Grab your skates, find a quiet patch of ice, and start with a wall-supported outside edge hold today. Your future self — the one carving clean turns and powerful crossovers — will thank you.