
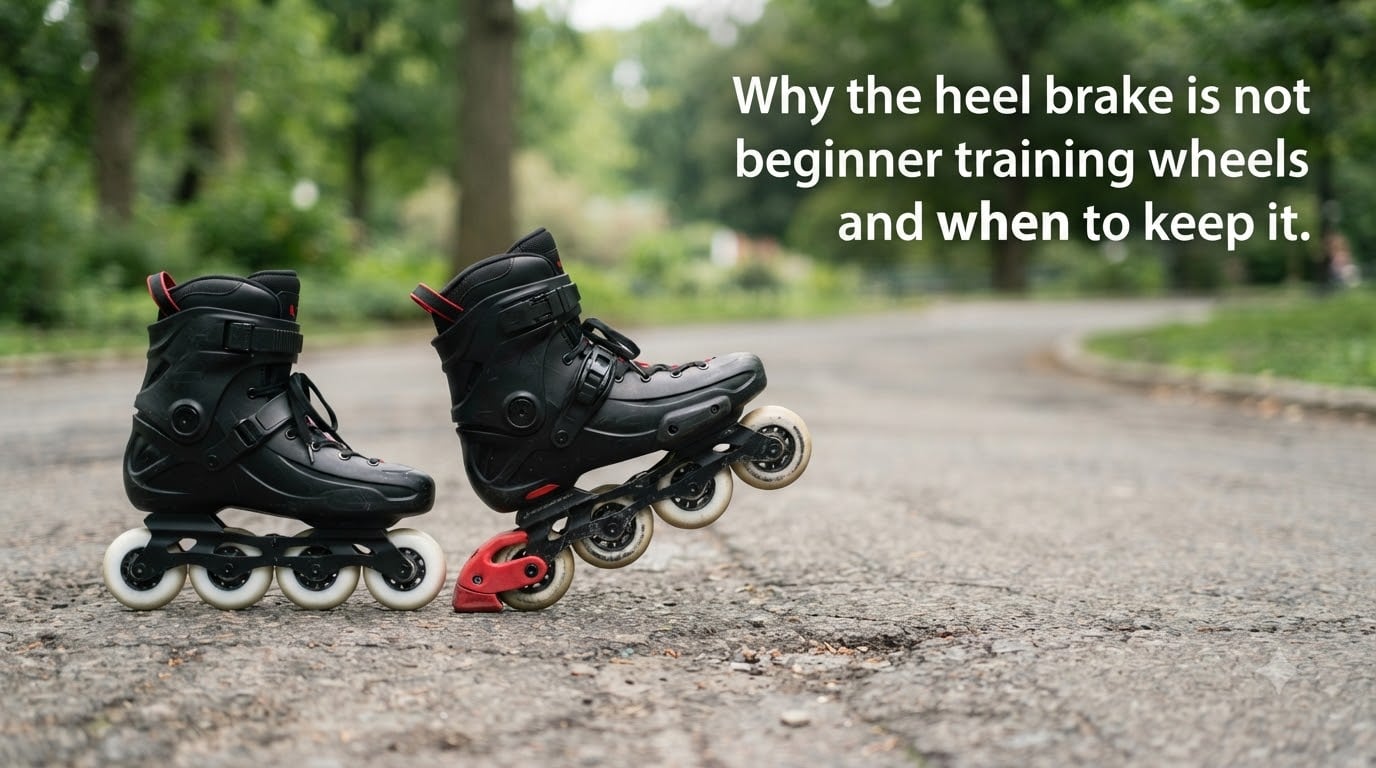
Walk into any skate park or group skating session and you’ll hear the same advice passed around: take off your heel brake, it’s just for beginners. Our team has been around inline skating long enough to know that this piece of conventional wisdom is not just wrong, it’s actively dangerous for a lot of skaters. The heel brake inline skating community relies on is one of the most misunderstood pieces of equipment on a skate, and treating it as a crutch to discard the moment you learn a T-stop can lead to some rough experiences on hills and in traffic.
We’ve talked with instructors, read through hundreds of forum threads from skaters who removed their brakes too early, and tested braking techniques ourselves across flat streets and steep descents. What we found is a clear pattern: skaters who keep their heel brake until they genuinely master alternatives have fewer injuries, more confidence, and actually progress faster. The ones who rip it off on day one to look “legit” often end up frustrated or worse.
This guide breaks down what the heel brake actually is, why the beginner-only stigma is misleading, and the specific situations where keeping it makes sense even at an advanced level. We’ll also walk you through a practical skill progression framework so you can decide for yourself when, or whether, to remove it.
Table of Contents
What Is a Heel Brake and How Does It Actually Work?
A heel brake is a rubber or composite pad mounted behind the rear wheel of one inline skate, designed to create friction against the ground when you tilt your foot forward. It is the most straightforward stopping method in inline skating because it uses a single, predictable motion rather than complex edge control or weight shifting.
Here is the mechanism in simple terms. You shift your weight to your non-brake skate, extend the brake skate forward, and lift your toes upward. That upward tilt presses the rubber pad into the pavement. Friction between the pad and the ground slows your momentum gradually or sharply, depending on how hard you press. The brake pad wears down over time and can be replaced, much like a car brake pad.
Most recreational and fitness skates come with a heel brake pre-installed on the right skate, though left-footed models exist. Some brands use a standard mounting system, while others like Rollerblade and FR use proprietary attachments. Universal brake adapters are available for skates that do not come with one, which is useful if you ride a flat-frame aggressive or freestyle setup and want to add stopping power.
The heel brake offers something no other stopping method can match: a wide margin for error. If you apply too much pressure, you simply stop faster. If you apply too little, you slow gradually. Compare that to a powerslide, where a mistimed weight shift can send you spinning or sliding out. That forgiving quality is exactly why the heel brake deserves more respect than it gets, and why calling it a crutch misses the point entirely.
The Myth That Heel Brakes Are Just Beginner Training Wheels
The idea that a heel brake is the skating equivalent of training wheels on a bicycle is one of the most persistent myths in the sport. It gets repeated in skate shops, on Reddit threads, and in group skating circles. The logic usually goes something like this: real skaters use T-stops and powerslides, so if you still have a brake, you must not be very good yet.
This thinking falls apart pretty quickly when you look at who actually uses heel brakes at a high level. Certified skating instructors, urban commuters, and marathon-distance skaters all frequently keep brakes on their setups. The SkateFresh instructional team, for example, explicitly recommends keeping the heel brake for street skating even at intermediate and advanced levels. These are people who teach skating for a living.
The training wheels comparison also breaks down mechanically. Training wheels prevent you from learning balance, which is the core skill of cycling. A heel brake does not prevent you from learning any other stopping technique. It simply gives you an additional tool. You can practice T-stops, snow plows, and powerslides all day long with a brake attached and never engage it. The brake just sits there until you need it.
Forum discussions paint a clear picture of the social pressure at work. Skaters on Reddit frequently report feeling self-conscious about having a brake on advanced skates. One common pattern we saw: beginners buy a pair of FR or Rollerblade skates, immediately remove the brake to fit in, and then spend weeks struggling to stop safely on hills. Many of those same skaters later say they wish they had kept it longer.
Here is the honest truth. Removing your heel brake before you have a reliable alternative stop is not a sign of progression. It is a sign of impatience. The skaters who impress us most are the ones confident enough to keep their brake on regardless of what anyone thinks, because they understand that having a dependable emergency stop matters far more than looking a certain way.
Where the Stigma Actually Comes From
Part of the stigma traces back to aggressive skating and park culture, where heel brakes genuinely get in the way. Grinds, soul tricks, and ramp work all require a clean frame with nothing hanging off the back. In that specific context, removing the brake is a functional necessity, not a status symbol.
The problem is that this park-skating convention leaked into street, fitness, and recreational skating, where it does not apply at all. Street skaters do not grind rails on their daily commute. They need to stop at intersections, navigate hills, and avoid pedestrians. None of that has anything to do with aggressive skating conventions, yet the pressure to remove the brake persists.
When Advanced Skaters Should Absolutely Keep the Heel Brake
There are specific, practical situations where even highly skilled skaters benefit enormously from keeping a heel brake. These are not edge cases or hypothetical scenarios. They are real-world conditions that skaters encounter every day.
You Live in or Skate in Hilly Areas
This is the single most important factor. If your local terrain includes hills with any meaningful gradient, the heel brake is your best friend. Downhill skating generates speed rapidly, and controlling that speed requires a technique that can maintain sustained friction without wearing out your wheels.
The T-stop, while excellent on flat ground, is far less effective on steep descents. Each T-stop application shaves material off your wheels, and on a long hill you may need to stop multiple times. A heel brake pad costs a fraction of what a set of wheels costs and is designed specifically for friction-heavy deceleration. On extended downhill sections, there is simply no better tool for controlled speed reduction.
The SkateFresh team puts it bluntly: if you live in a hilly location, keep the heel brake until your alternative methods are not just proficient but completely reliable under pressure. That is sound advice, and it comes from instructors who have seen what happens when skaters are underprepared on descents.
You Skate in Urban Traffic
Street skating and urban commuting involve constant stop-and-go scenarios. Cars pulling out, pedestrians stepping into bike lanes, doors opening, traffic lights changing. You need a stopping method that works instantly and reliably in unpredictable conditions, often at speed.
A heel brake gives you that instant response. No setup time, no edge transitions, no foot repositioning. You just lean back and press. In a genuine emergency where a car cuts you off, that fraction of a second difference between engaging a heel brake and setting up a T-stop can be the difference between a clean stop and a collision.
You Skate in Groups
Group skating adds a layer of complexity that solo skating does not. When you skate in a pack, sudden stops ripple backward through the group. If the skater in front of you stops hard and you rely solely on a T-stop, your reaction window is tight. A heel brake lets you modulate your deceleration smoothly without the lateral drift that a T-stop can produce, reducing the chance of a pile-up.
You Want a Reliable Backup
Even skaters who have mastered T-stops, powerslides, and lunge stops can benefit from a backup system. Equipment fails, conditions change, and fatigue affects technique. If your T-stop wheel is worn flat after a long session and your legs are tired, having a heel brake as a fallback is not weakness. It is smart risk management.
Think of it like a spare tire. You hope you never need it, but you carry it because the alternative is being stranded. No one calls a spare tire a crutch. The same logic applies here.
Alternative Stopping Techniques Compared
If you are considering removing your heel brake, you need to understand what the alternatives offer, what they demand from you, and where each one falls short. Let’s break down the four most common stopping methods skaters use after going brake-free.
The T-Stop
The T-stop is the most popular alternative to the heel brake. You transfer your weight to one skate and drag the other skate behind you at a 90-degree angle, using the wheels’ surface to create friction against the ground. It works well on flat terrain at moderate speeds and is relatively easy to learn at a basic level.
However, mastering the T-stop to the point where it is reliable in emergencies takes significant practice. Beginners often drag too lightly, failing to slow enough, or lean incorrectly and spin out. The T-stop also wears down your wheels unevenly, flattening them on one side over time. On steep hills or wet pavement, it becomes markedly less effective.
The Snow Plow (Plough Stop)
The snow plow stop mimics the technique used in ice skating and skiing. You point both toes inward and press the inside edges of your wheels against the ground, creating friction on both skates simultaneously. This method provides good speed control on gentle slopes and is gentler on wheels than the T-stop.
The trade-off is that the snow plow requires significant knee bend and edge control. It is harder to execute at high speeds, and on very steep terrain it simply cannot generate enough friction to stop you quickly. Many skaters use it as a speed-modulation tool rather than a hard stop.
The Powerslide
The powerslide is the most dramatic and effective stopping technique in inline skating. You rotate your body 180 degrees and slide backward on one skate while the other skate controls the slide. Done correctly, it stops you fast and looks impressive. Done incorrectly, it can result in a hard fall.
This technique demands strong balance, edge control, and body awareness. It typically takes months of dedicated practice to execute reliably at speed. For most skaters, the powerslide is a goal to work toward, not a day-one replacement for the heel brake.
The Lunge Stop
The lunge stop involves stepping one skate far forward and dragging the other skate behind at an angle, similar to a deep lunge position. It provides strong stopping power and transitions well into a change of direction. It is less common than the T-stop but valued by skaters who want a powerful stop that does not wear wheels as aggressively.
The challenge is balance and flexibility. The deep lunge position requires leg strength and ankle stability. It is an intermediate-to-advanced technique that complements rather than replaces other stops.
Quick Comparison of Stopping Methods
Each method has distinct strengths. The heel brake wins on ease of learning, emergency reliability, and cost-effectiveness since pads are cheap to replace. The T-stop excels on flat ground and in tight spaces. The snow plow is best for gradual speed control on gentle slopes. The powerslide offers the strongest stopping power but demands the most skill. The lunge stop balances power with directional control.
No single stopping method covers every situation. The best skaters carry a toolkit of techniques, and for many of them, the heel brake remains part of that toolkit indefinitely.
A Skill Progression Framework for Removing the Brake
One of the biggest content gaps we found across forums and competitor articles is the absence of a clear, honest rubric for knowing when you are ready to remove your heel brake. So we built one. This framework is based on instructor recommendations and real-world skater experiences from the communities we researched.
If you cannot confidently check every box below, keep your brake on. There is no rush, and removing it prematurely will only slow your progression.
Level 1: Basic Confidence
You can skate forward with balance, turn in both directions, and use your heel brake reliably to stop from a full sprint without wobbling or losing control. This is the baseline. If you are still mastering this, removing the brake is not even a question.
Level 2: T-Stop Proficiency
You can execute a clean T-stop on flat ground at moderate speed and come to a complete stop within a controlled distance. You can do it with either foot as the dragging skate. You can maintain a straight line during the stop without drifting sideways. This typically takes several weeks to months of consistent practice.
Level 3: Speed and Emergency Reliability
You can T-stop at high speed, the kind of speed you reach on a moderate hill or during a fast group skate. Your stop is not just technically correct but instinctive. You do not have to think about foot placement or edge angle. In a sudden obstacle scenario, your T-stop fires automatically. This is the level most skaters never honestly reach before removing the brake.
Level 4: Downhill Competence
You can control your speed and stop safely on the steepest hill in your regular skating area using only alternative techniques. If your local routes include descents, you need to prove to yourself that you can handle them without a brake before removing one. Practice on the hill with the brake still attached, using alternative stops while knowing the brake is there if you need it.
Level 5: Backup Technique Mastery
You have at least two reliable alternative stopping methods, not just one. If your T-stop fails because of wheel wear, wet pavement, or fatigue, you have a second option that works. A single stopping method is not enough for the unpredictability of street skating.
The Readiness Checklist
Before removing your heel brake, ask yourself these questions honestly. Can you stop from full speed on flat ground using an alternative method? Can you stop on the steepest hill you regularly skate? Can you stop with either foot? Do you have at least two alternative stops you trust? If you hesitated on any of these, you are not ready yet, and that is completely fine.
Downhill Safety and Regional Considerations
Where you skate should heavily influence your braking setup. Terrain is not a minor factor. It is arguably the most important variable in the brake-or-no-brake decision, and it gets glossed over far too often in online discussions.
If you live in a flat city with minimal elevation changes, your braking needs are different from someone who skates in a hilly region. On flat ground, the T-stop and snow plow are usually sufficient for daily skating, and removing the heel brake carries less risk. You still need solid technique, but the consequences of a missed stop are generally less severe at lower speeds.
Hilly terrain changes the calculus entirely. Descents build speed fast, and the longer the hill, the more speed you carry. Stopping on a steep grade requires sustained, controlled friction. The heel brake is purpose-built for exactly this scenario. It allows you to feather your speed on long descents without destroying your wheels or risking a high-speed T-stop that could go wrong.
Wet conditions add another layer. Heel brakes lose some effectiveness on wet pavement, but so does every other stopping method. The heel brake still offers more predictable friction than a T-stop on slick surfaces because it does not depend on edge grip the way wheel-dragging techniques do.
Group skate safety deserves special mention. When skating in a group, particularly on routes with hills, the lead skater sets the pace but the trailing skaters bear the risk. If the group descends together and the back skater cannot stop reliably, the entire pack is in danger. Keeping a heel brake in group scenarios is not just about your safety but everyone’s.
Our recommendation for regional terrain: flat-area skaters can consider removing the brake after reaching Level 3 in the progression framework above. Hilly-area skaters should seriously consider keeping it indefinitely, or at minimum until they reach Level 5 and have proven downhill competence across multiple sessions.
Frequently Asked Questions
Why don’t inline skates have brakes?
Many inline skates do come with heel brakes, especially recreational and fitness models. However, aggressive, speed, and freestyle skates often omit them because the brake interferes with grinds, slides, and footwork. The absence is a design choice for specific disciplines, not a universal standard.
What is the most effective way to stop on inline skates?
The most effective stop depends on your speed and terrain. For emergencies, the heel brake offers the fastest, most reliable response. For flat-ground skating, the T-stop is the most versatile everyday stop. For maximum stopping power, the powerslide is the strongest but requires the most skill to execute safely.
How to stop on inline skates without heel brake?
The main brake-free stopping methods are the T-stop (dragging one skate at 90 degrees), the snow plow or plough stop (pointing both toes inward), the powerslide (180-degree rotation into a backward slide), and the lunge stop (deep forward step with trailing drag). Each requires practice to master.
When should I remove my heel brake?
Only remove your heel brake when you can reliably stop from full speed using at least two alternative methods on both flat ground and the steepest hills you regularly skate. If you cannot stop confidently with either foot under pressure, keep the brake on until you can.
Is the heel brake only for beginners?
No. The heel brake is used by certified instructors, urban commuters, and experienced skaters in hilly areas. It provides the most reliable emergency stop and is specifically designed for sustained downhill speed control. Treating it as beginner-only is a widespread myth that leads many skaters to remove it prematurely.
Final Thoughts on the Heel Brake Debate
The heel brake is not beginner training wheels. It is a purpose-built safety tool that serves skaters at every level, especially in hills, traffic, and group settings. Our advice is simple: ignore the pressure, keep your brake until you have genuinely earned its removal through proven skill, and remember that the best skaters are the ones who can stop confidently, not the ones who look the part. Your safety is worth far more than someone else’s opinion about your setup.