
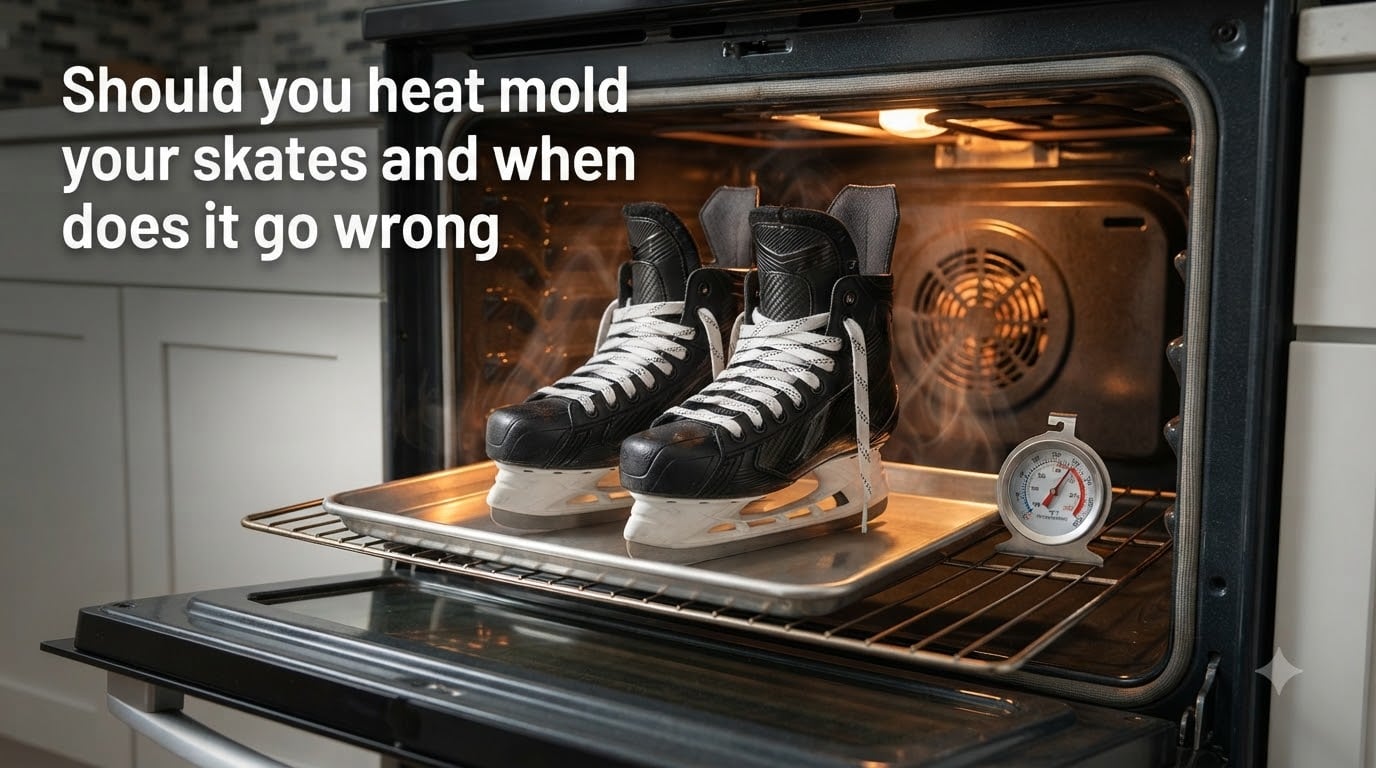
Yes, you should heat mold your skates if you own mid-range or high-end thermoformable boots and want a custom fit without weeks of painful break-in. Heat molding, also called baking, softens the boot materials so they conform to your foot shape, eliminating hot spots and improving power transfer on the ice.
But here is the catch: heat molding goes wrong more often than most skaters realize. The wrong temperature, the wrong skate tier, or stepping on the boot while it is still warm can permanently destroy a $400 pair of skates. I have seen forum posts, pro shop horror stories, and firsthand accounts of melted eyelets and collapsed quarter packages.
In this guide, I break down exactly when to heat mold your skates, when to leave them alone, and the specific warning signs that tell you the process is going sideways. Whether you are considering a pro shop bake or a DIY oven job, you will know exactly what to do.
Table of Contents
What Heat Molding Actually Does to Your Skates?
Heat molding works because modern skate boots contain thermoformable resins woven into composite materials. When heated to the right temperature range, these resins temporarily soften and become pliable. As the boot cools around your foot, the resins harden into a new shape that matches your anatomy.
Think of it like a memory foam mattress, except the shape becomes permanent once the material fully cures. The quarter package (the rigid outer shell of the boot) is the primary component that responds to heat. Inside the boot, memory foam layers and ankle padding also compress and reshape during the process.
The critical temperature window falls between 175F and 210F (79C to 99C). At this range, thermoformable materials reach their glass transition point without damaging structural adhesives. Below 175F, the resins barely soften and you get minimal customization. Above 210F, you risk delamination, adhesive failure, and permanent boot deformation.
Most skate manufacturers specify 175F for 6 to 8 minutes as the sweet spot. Some brands allow up to 200F, but anything beyond 210F is asking for trouble regardless of what skate you own.
When You Should Heat Mold Your Skates
You should heat mold your skates when three conditions are met: the boot is rated as heat moldable, you are dealing with fit discomfort that baking can actually solve, and you have access to proper temperature control. Let me break down each scenario.
Mid-Range and High-End Hockey Skates
Mid-range skates (roughly $200 to $400 retail) and high-end models ($400 and above) almost always feature thermoformable quarter packages. Brands like Bauer, CCM, and True design these boots specifically for heat molding. If you just dropped serious money on a pair of Vapor or Jetspeed skates, baking them is the expected next step.
These boots use composite materials with embedded thermoformable resins that are engineered to soften and reshape. The manufacturer’s warranty typically covers heat molding when done correctly, either at a pro shop or following official instructions.
Specific Fit Problems That Baking Solves
Heat molding excels at addressing localized pressure points. If you have bone prominences on your ankle, a narrow heel that keeps slipping, or arch discomfort from a stiff boot, baking lets the material contour around those areas. Players with wide forefeet often find that a proper bake opens up the toe box just enough to eliminate pinching.
Baking also dramatically shortens the break-in period. Instead of suffering through 10 to 15 hours of ice time before your skates feel right, a heat-molded pair can feel game-ready after just a couple of sessions. For anyone who skates regularly, that comfort difference is worth the effort.
Figure Skates Designed for Heat Molding
Many mid-tier and advanced figure skate boots from brands like Jackson, Riedell, and Edea are also heat moldable. The same principles apply: check the manufacturer specifications before attempting any bake. Some figure skate boots require lower temperatures or specialized approaches compared to hockey skates.
When You Should NOT Heat Mold Your Skates
Do not heat mold your skates if they are entry-level models, if you are unsure whether the materials are thermoformable, or if the boots are already fully broken in. These situations account for nearly every baking disaster I have come across.
Entry-Level Skates: The Number One Mistake
Entry-level skates (typically under $150) are built with standard synthetic materials that are not designed to handle baking temperatures. The quarter packages on these skates use basic plastics and adhesives that can warp, delaminate, or even melt when exposed to oven heat. Multiple forum users on r/hockeyplayers have reported permanently damaging budget skates by trying to bake them at home.
A common scenario: someone buys a $90 pair of recreational skates, finds them uncomfortable, and decides to bake them. The boot warps, the eyelets pull loose, and the structural geometry collapses. The skates are now garbage. Always verify that your skates are explicitly rated as heat moldable before attempting anything.
Already Broken-In Skates
If you have been skating in your boots for months and they have already formed to your feet, baking them again is pointless and risky. The materials have already settled into their permanent shape. Reheating them can weaken the structural integrity without providing any meaningful fit improvement. If your broken-in skates are causing new pain, the issue is likely foot changes, skate wear, or a need for targeted stretching rather than a full rebake.
Non-Moldable Materials
Some skate components simply do not respond to heat the way thermoformable composites do. Older skate models, certain recreational boots, and skates with heavy synthetic leather construction may look like they should be bakeable but are not. When in doubt, contact the manufacturer or visit a pro shop for confirmation.
How to Heat Mold Skates Properly: Step by Step
If your skates qualify for heat molding and you want to understand the process, here is the proper step-by-step method. These are the same fundamentals that pro shops follow, whether you are doing this at home or having it done professionally.
Step 1: Verify your skates are heat moldable. Check the manufacturer’s documentation, look for a heat moldable label on the boot, or contact the brand directly. If you cannot confirm this, stop here.
Step 2: Preheat the oven to 175F (79C). Use a convection setting if available for even heat distribution. Verify the temperature with a separate oven thermometer, since home ovens can be off by 25 degrees or more. Never exceed 210F under any circumstances.
Step 3: Prepare the skates. Remove the footbeds and loosen the laces fully. Some sources recommend wrapping the skates in a clean towel or using a baking sheet to protect both the skates and your oven.
Step 4: Bake for 6 to 8 minutes. Place the skates in the oven and monitor them closely. Never walk away during this step. You are looking for the boots to become warm and slightly pliable, not melting or deforming.
Step 5: Put the skates on immediately. Sit down, slip on the warm skates, and lace them firmly but not excessively tight. Position your knees at a 90-degree angle and stay seated for 15 to 20 minutes while the boots cool and conform to your feet.
Step 6: Remove and let cure for 24 hours. After the initial cooling period, take the skates off and let them sit undisturbed for a full 24 hours. Do not skate, walk, or even lace them during this curing window.
When Heat Molding Goes Wrong: Warning Signs and Failure Scenarios
This is the section most guides gloss over, but it is the one that saves you money. Here are the specific ways heat molding fails, the warning signs to watch for, and what to do if things start going sideways.
Overbaking: The Silent Boot Killer
Overbaking happens when the oven temperature is too high, the skates stay in too long, or both. The first warning sign is a chemical or burning smell coming from the oven. If you notice this, remove the skates immediately. By the time you see visible smoke, structural damage has already occurred.
Overbaked boots may look fine on the outside but suffer from weakened adhesive bonds inside the composite layers. The quarter package loses its rigidity over the following weeks, causing the boot to flex improperly during skating. This is not always immediately visible, which makes it especially dangerous.
Eyelet and Lace Zone Damage
Excessive heat softens the adhesive that holds eyelets in place. If you pull laces too aggressively while the boot is still warm, eyelets can shift, pull through the material, or detach entirely. This is one of the most common and frustrating forms of baking damage.
The fix: when lacing warm skates during the cooling phase, pull the laces outward and around, never straight upward. Apply firm but controlled tension. Forum users consistently report that upward yanking is the single most common cause of eyelet damage during home baking.
Structural Deformation From Walking on Warm Skates
This one is almost entirely preventable but happens constantly. Players take their freshly baked skates out of the oven, put them on, and then walk around the house to see how they feel. The still-soft sole plate and quarter package deform under body weight and irregular flooring.
The result is a boot that has molded to the shape of your kitchen floor instead of your foot. You may notice the blade alignment feels off, or one side of the boot appears to lean. Once the material cures in this deformed position, it is extremely difficult to correct.
During the cooling phase, sit still. Keep your feet flat on the floor with knees at 90 degrees. Do not stand, walk, or shift weight around for the full 15 to 20 minutes.
Quarter Package Collapse
When entry-level skates are baked at temperatures meant for thermoformable composites, the standard plastics in the quarter package can lose their shape entirely. The boot may flatten, twist, or develop visible creases. One viral post from a hockey shop showed a pair of entry-level skates that had essentially melted into a puddled shape after a home oven bake.
If you see visible warping, bubbling on the boot surface, or separation between layers of the quarter package, the damage is irreversible. Those skates are done.
Lace Bite That Gets Worse After Baking
Sometimes baking does not solve your problem but makes it worse. If the boot tongue compresses unevenly during molding, it can create a sharper ridge along the lace bite zone. Players who baked to fix lace bite sometimes report the condition worsening afterward.
If you are prone to lace bite, consider using a gel pad or tongue pad during the cooling phase to maintain cushioning space. Targeted boot stretching at a pro shop is often a better solution for persistent lace bite than a full heat mold.
Warning Signs Checklist: Did Your Bake Go Wrong?
After baking, inspect your skates for these red flags. Any one of them suggests the process may have caused damage:
Visible warping, twisting, or asymmetry between left and right boots. Separation or bubbling in the quarter package material. Eyelets that feel loose or have shifted position. A chemical or burnt smell that persists after cooling. Boots that feel softer or more flexible than they should at any point during use. Blades that appear misaligned or sit at an angle on a flat surface.
If you notice any of these signs, take the skates to a pro shop for assessment before skating on them. Using damaged boots can lead to ankle injuries and accelerated skate failure.
Professional vs DIY Heat Molding: What You Need to Know
The choice between a pro shop bake and a home oven job comes down to risk tolerance, equipment, and the value of your skates. Both approaches can produce good results, but the margin for error is very different.
Pro Shop Baking: The Safer Route
Pro shops use specialized skate ovens designed specifically for heat molding. These ovens deliver precise, even convection heat at controlled temperatures, eliminating the hot spots and calibration issues that plague home ovens. A trained technician also monitors the process and handles the cooling phase correctly.
Many shops include baking with a skate purchase, and standalone baking typically costs $20 to $40. For skates in the $300-plus range, that small fee is excellent insurance against a $400 mistake. Pro shop baking also keeps your manufacturer warranty intact, since most brands require professional installation for warranty coverage.
Home Baking: Higher Risk, Acceptable With Care
Home baking is a viable option if you have a reliable convection oven, an oven thermometer, mid-range or high-end skates, and the discipline to follow instructions precisely. Many experienced players bake their own skates successfully. The key is treating the process with the same respect a pro shop would.
That said, home ovens are notoriously inaccurate. A dial set to 175F might actually produce 200F or 150F. Without a separate thermometer to verify, you are guessing. The oven also heats unevenly, with hot spots near the elements that can scorch one part of the boot while leaving another underheated.
Warranty Implications
This is a big one. Most major skate manufacturers state that improper heat molding voids the warranty. Bauer, CCM, and True all have specific baking guidelines, and damage from exceeding those parameters is not covered. If you bake at home and something goes wrong, you are on your own financially.
Pro shop baking typically preserves warranty coverage because the shop follows manufacturer protocols and assumes responsibility for the process. For expensive skates, this alone can justify the cost.
The 24-Hour Rule: Why Curing Time Matters
After heat molding, the thermoformable resins need a full 24 hours to complete their chemical curing process. During this time, the materials undergo molecular cross-linking that locks the new shape into place. Skating before this process finishes disrupts the cure and can distort the fit.
Many impatient skaters wait only a few hours before hitting the ice, and they frequently report that the custom fit never fully set. The boot may feel fine initially but gradually shifts back toward its original shape. Some users even report the boot developing creases or pressure points from skating on incompletely cured materials.
The rule is simple: bake today, skate tomorrow. Mark your calendar and resist the temptation to test them early. Those 24 hours are not a suggestion, they are a chemical requirement.
Can You Heat Mold Skates a Second Time?
Yes, you can heat mold skates a second time, but only under specific conditions and with diminishing returns. Most manufacturers allow one or two bakes per boot over its lifetime. Beyond that, repeated heating cycles degrade the composite materials and adhesives, weakening the boot structure.
A second bake makes sense if your foot shape has changed, you are addressing a specific persistent pressure point, or the first bake did not take properly due to temperature issues. It does not make sense as a routine maintenance step or as a fix for skates that simply do not fit your foot volume profile.
Never bake a boot more than twice. Each heating cycle breaks down the thermoformable resins further, and after two bakes the structural integrity of the quarter package is compromised. If your skates still do not fit after two proper bakes, you likely need a different boot model or a custom fitting solution.
Frequently Asked Questions
How long to wait after heat molding skates?
You must wait a full 24 hours after heat molding before skating on your skates. The thermoformable resins need this time to complete their chemical curing process, which locks the custom shape permanently into the boot material. Skating before the 24-hour period finishes can distort the fit and cause the boot to shift back toward its original shape.
Should I heat mold my skates?
You should heat mold your skates if they are mid-range or high-end models rated as thermoformable and you want a faster, more comfortable break-in. Do not heat mold entry-level skates, as their standard synthetic materials are not designed for baking temperatures and can warp or delaminate. If you are unsure whether your skates are heat moldable, check the manufacturer documentation or ask a pro shop before proceeding.
Can you heat mold skates a second time?
Yes, you can heat mold skates a second time if needed, but most manufacturers recommend no more than two bakes over the life of the boot. Each heating cycle degrades the thermoformable resins and structural adhesives, so a third bake risks weakening the quarter package. A second bake is appropriate for addressing specific fit issues or if the first bake did not take properly.
How to properly mold skates?
Preheat a convection oven to 175F and verify with a thermometer. Bake heat moldable skates for 6 to 8 minutes, then immediately put them on and lace firmly while seated with knees at 90 degrees. Sit still for 15 to 20 minutes while the boots cool and conform to your feet, then remove and let cure undisturbed for 24 hours before skating. Never exceed 210F, never walk on warm skates, and pull laces outward rather than upward.
Conclusion
Heat molding your skates is one of the best things you can do for comfort and performance, provided you follow the rules. If you own mid-range or high-end thermoformable boots, baking them at 175F for 6 to 8 minutes with proper cooling and a full 24-hour cure will transform your fit and dramatically reduce break-in time.
The decision to heat mold your skates comes down to knowing your equipment and respecting the process. Entry-level skates should never be baked. Home ovens need thermometer verification. And the cooling and curing phases are just as important as the heating phase itself. When heat molding goes wrong, it usually goes wrong because someone skipped a step, ignored a temperature spec, or got impatient during the 24-hour wait.
If you are uncertain about any part of the process, spend the $20 to $40 on a pro shop bake. It is the cheapest insurance you will ever buy for a pair of skates. Take the time, follow the guidelines, and your feet will thank you every time you step on the ice.