
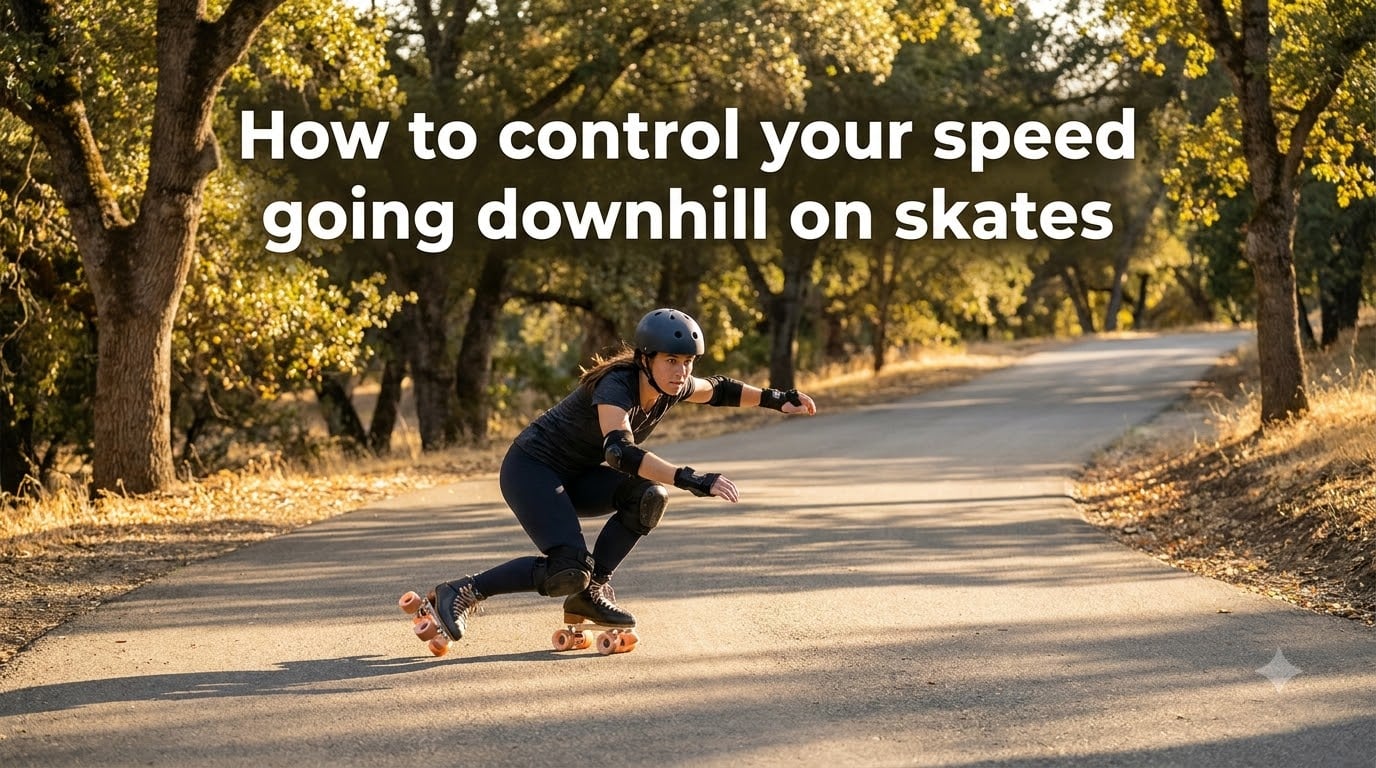
Learning how to control your speed going downhill on skates is the moment every skater realizes flat-ground cruising is just the warm-up. I remember the first hill that made my stomach drop, a moderate slope near my neighborhood park that felt like a six-lane highway after a few seconds of rolling. If you have ever gripped your laces white-knuckled on a downhill, this guide is for you.
Our team has spent years teaching beginners how to skate down hills safely, and we have tested every method we cover here. By the end of this article, you will know the body position that keeps you stable, the four braking techniques ranked by skill level, and a week-by-week practice progression that takes the fear out of downhill skating.
Table of Contents
How to control your speed going downhill on skates: the fundamentals
Downhill speed control is not about stopping. It is about managing your pace so you stay upright, in control, and able to react. The three pillars are body position, braking technique, and reading the hill ahead of you. Get any one of those wrong and the others have to compensate, which is where most falls happen.
Before you attempt any slope, get comfortable on flat ground first. Skaters who try to learn speed control before they can balance on one foot or stop on flat ground tend to panic on hills. The good news is the same muscle groups and habits that work on flat ground transfer directly to downhill skating.
Body positioning for downhill speed control
Your stance on a hill is the single biggest factor in how safe you feel. Stand with your feet shoulder-width apart, knees deeply bent, and weight centered over the balls of your feet. Avoid leaning back or sticking your hips out, both of which shift your center of gravity behind your skates and make falls backward more likely.
Keep your chest up, shoulders relaxed, and eyes looking forward at where you want to go, not down at your feet. The moment you look down, your body tends to follow, and on a slope that means a fast forward tumble. Our team has watched dozens of beginners fall simply because they dropped their gaze for two seconds.
The athletic stance explained
Imagine a boxer or a surfer. Slight crouch, hands out for balance, weight low. On skates, this athletic stance lowers your center of gravity and lets your legs absorb bumps and cracks instead of your knees buckling. The lower you sit, the more stable you feel at speed, but do not crouch so deep that your quads burn out halfway down the hill.
T-stop technique: the most common braking method
The T-stop is the first braking technique most skaters learn, and for good reason. It works on both inline skates and quad skates, it is forgiving on small mistakes, and you can modulate the braking force by how hard you press. We teach it to every beginner in our local group.
Step-by-step T-stop
Step 1: Skate forward with both feet parallel, knees bent.
Step 2: Shift your weight to your dominant leg, which stays straight and rolling.
Step 3: Drag your back foot behind you, perpendicular to the front foot, so the wheels create a T shape.
Step 4: Apply gentle pressure with the back foot. More pressure equals more braking.
Step 5: Keep your shoulders facing forward and your weight on the front foot. Do not twist your hips toward the back foot.
Start practicing on flat ground before you take a T-stop to a hill. Once you can stop from a moderate roll on flat ground, you are ready to use it on a gentle slope.
When to use the T-stop
The T-stop shines on gentle to moderate slopes when you need to lose maybe 30 to 50 percent of your speed. It is not the best choice for very steep hills or emergency stops because you can lose balance if you push too hard. For those situations, you will want the plow stop or power slide covered below.
Toe stop drag for beginners on gentle slopes
The toe stop drag is the friendliest downhill technique for new quad skaters. Most quad skates come with a rubber toe stop mounted at the front, and you use it by gently pressing it against the ground while rolling. It creates friction right where you need it, with very little balancing skill required.
How to drag your toe stop
Bend both knees deeply, shift your weight slightly to one foot, and lift the toe of the other skate just enough to press the rubber stopper against the pavement. The drag should be light at first. Pressing too hard can throw you forward. As you slow down, ease off the pressure so you do not stop abruptly and lose balance.
This method works best on smooth pavement and gentle slopes. It is less effective on rough asphalt, wet ground, or steep hills where you need more aggressive braking. Inline skaters do not have a toe stop, so this technique is mainly for quad skaters.
Plow stop and power slide for steeper hills
When the hill gets steeper or your speed feels out of control, you need a braking technique with more bite. The plow stop and the power slide are two methods that let you shed serious speed without falling.
Plow stop mechanics
Point your toes inward like a penguin, push your heels outward, and let the inner edges of your wheels bite into the pavement. The wider your stance, the more braking force you create. Keep your knees bent and your chest forward. If your weight drifts backward, you will sit down hard.
The plow stop is excellent for moderate slopes where you want to lose most of your speed without stopping completely. Many skaters use it as a controlled way to come to a full halt at the bottom of a hill.
Power slide when you need to lose speed fast
The power slide is the aggressive cousin of the plow stop. You turn both skates sideways at roughly 90 degrees to your direction of travel and let them slide. This is an advanced move, and we only recommend it after you have mastered the T-stop and plow stop on flat ground.
On a steep hill, the power slide is your emergency brake. It creates a huge amount of friction fast, which is exactly what you want when a car pulls out or a pedestrian steps into your path. Practice it in an empty parking lot before you ever need it in real life.
Carving and S-curves: speed control without stopping
Carving is the technique I use most often on long, moderate hills. Instead of braking, you redirect your momentum across the slope in a series of S-curves. Each turn eats a bit of speed because you are fighting against your own forward motion to change direction.
To carve, lean into each turn with your knees bent and your weight on the outside skate of the curve. Push out of one turn directly into the next, making a smooth zigzag down the hill. The tighter your S-curves, the more speed you shed. Wide sweeping curves barely slow you down at all.
Carving is also the safest technique on crowded paths because you maintain forward motion and stay in control of your line. It is the technique most often recommended by experienced skaters on forums when beginners ask about speed control.
Reading the hill ahead
Before you commit to a hill, look at the whole slope. Notice where it steepens, where the pavement cracks or shifts, and where you might need to brake harder. Pick your line before you start rolling. Skaters who decide mid-hill how to handle a slope usually end up making the wrong choice under pressure.
Heel brake vs toe stop: which should you use downhill?
If you skate on inline skates, you likely have a heel brake at the back of one skate. If you skate quads, you have a toe stop at the front. Both work for downhill, but they feel different and have different strengths.
Inline skate heel brake
The heel brake is the simplest downhill tool for inline skaters. Lift your front foot slightly, press the heel brake down, and let the rubber pad drag. Keep your weight over the rolling foot or you will tip backward. Heel brakes are great for beginners because the motion is intuitive and easy to modulate.
Quad skate toe stop
The toe stop on a quad skate is faster to engage than a heel brake because you do not need to lift your foot. It is also more versatile, useful for quick stops, slow-speed maneuvering, and downhill control. The downside is that it takes practice to use the right amount of pressure without jolting yourself forward.
Our team prefers the toe stop for most quad skaters learning downhill control, because it stays out of the way when you do not need it and snaps into action the moment you do.
Gear adjustments that make downhill easier
Your equipment has a big impact on how skates handle downhill. Two adjustments matter most for beginners: wheel hardness and truck tension.
Wheel hardness
Wheel hardness is measured on the durometer scale. Softer wheels (around 78A to 85A) grip the road better and give you more control at speed, which makes them ideal for beginners tackling downhill for the first time. Harder wheels (88A and up) slide more easily, which experienced skaters love for tricks but new skaters find unsettling on hills.
If your skates came with hard wheels and you are struggling on slopes, swapping to softer wheels is one of the single biggest improvements you can make. The added grip makes every braking technique easier.
Truck tension
Trucks are the metal axles on quad skates that hold the wheels. Looser trucks let you carve more easily but feel wobbly at speed. Tighter trucks feel stable but turn more slowly. For downhill, most beginners prefer slightly tighter trucks than they would use for flat-ground cruising, because the added stability reduces wobble and helps every braking technique work more predictably.
Practice progression: from gentle slopes to steep hills
Most beginners try to learn downhill control on hills that are too steep, too soon. I did the same thing my first month and ended up with a sprained wrist. Here is the progression our team uses with new skaters.
Beginner week-by-week plan
Week 1: Practice T-stop and toe stop drag on flat ground until they feel automatic.
Week 2: Find a slope with a 2 to 3 percent grade, basically a very gentle driveway. Skate down it using only carving. No braking yet.
Week 3: On the same gentle slope, add the T-stop halfway down. Build confidence that you can slow yourself if needed.
Week 4: Move to a 4 to 6 percent grade, a typical residential street. Use carving and T-stops together.
Week 5: Try a 7 to 10 percent grade. Begin practicing the plow stop on this slope.
Week 6 and beyond: Work up to steeper hills, adding the power slide to your toolkit once you feel ready.
When to level up
You are ready for a steeper hill when the current slope feels boring. If you can carve and brake on a 5 percent grade without thinking about it, your body is telling you it wants more challenge. Move up gradually and you will rarely feel out of control.
Fear management and mental preparation for downhill skating
The biggest barrier to downhill skating is not technique. It is fear. The forums are full of skaters who have the skills to handle a hill but freeze up at the top because their brain is screaming that they are about to die. I have been there, and so has every skater I coach.
Why fear makes you fall
When you are scared, your body tenses, your weight shifts backward, and your reactions get slower. All three of those responses make falls more likely. The cure is not bravery. It is preparation. Every hour you spend practicing braking and carving on gentler slopes trains your nervous system to recognize downhill as a normal situation, not an emergency.
Build confidence gradually
Start with hills so small you almost feel silly calling them hills. Skate down them again and again until your brain stops treating them as threats. Slowly increase the slope angle over weeks. By the time you tackle a real hill, your body will already know what to do because it has done simpler versions dozens of times.
Skating with a friend also helps enormously. A buddy at the bottom of the hill, or skating next to you, gives you a safety net that makes your first attempts feel less risky.
Common mistakes to avoid when controlling downhill speed
After coaching hundreds of beginners, I see the same downhill mistakes over and over. Avoiding them will save you from most of the falls beginners experience.
Mistake 1: Leaning back. Your weight should stay forward over your feet. Leaning back puts you in a position where any forward push from your skates can flip you onto your back.
Mistake 2: Looking at your feet. Your eyes should look ahead at where you want to go, not at the pavement under your toes. Looking down causes your body to curl forward and ruins your balance.
Mistake 3: Skipping protective gear. Helmet, wrist guards, and knee pads are not optional on hills. The falls at speed hurt more, and protection lets you take the kind of risks you need to learn.
Mistake 4: Trying advanced hills too soon. Build up gradually. Beginners who jump to steep hills before mastering basics usually end up hurt and discouraged.
Mistake 5: Locking up the brakes. Slamming any braking technique at full force will throw you. Smooth, progressive braking is faster overall and much safer.
Frequently asked questions about downhill skate speed control
How do you slow down on rollerblades going downhill?
To slow down on rollerblades going downhill, use your heel brake by pressing it down with your back foot while keeping weight on the rolling front foot. You can also carve in S-curves across the slope or use the T-stop by dragging one skate perpendicular behind the other. Each method sheds different amounts of speed, so choose based on how steep the hill is.
How to stop on skates downhill?
To stop on skates downhill, pick the right technique for your speed. For gentle slopes, the toe stop drag or heel brake works well. For moderate slopes, use the T-stop. For steep hills or emergency stops, the power slide is most effective. Always keep knees bent, weight centered, and eyes forward.
What is the best brake technique for downhill skating?
The best brake technique depends on your skill level and the hill. Beginners should start with the toe stop drag or heel brake. Intermediate skaters get the most control from the T-stop. Advanced skaters use the plow stop and power slide on steep hills. Carving is the best technique when you want to control speed without stopping.
Why am I scared to go downhill on skates?
Fear of downhill skating comes from uncertainty about whether you can stop or control your speed. The cure is practice on gentle slopes until braking feels automatic, then gradually working up to steeper hills. Skating with a friend, wearing protective gear, and starting with smaller hills all reduce fear quickly.
How to stop when going fast on skates?
When going fast on skates, the most reliable emergency stop is the power slide. Turn both skates sideways at 90 degrees to your direction of travel and let them slide. Keep knees bent and weight centered. Practice this in an empty parking lot before you need it on a real hill.
Final thoughts on mastering downhill speed control
Learning how to control your speed going downhill on skates is a journey, not a single skill. Start with body positioning and carving on gentle slopes, add the T-stop and toe stop drag as your confidence grows, and work up to the plow stop and power slide when you are ready for steeper hills. Wear your gear, practice often, and let your fear shrink one slope at a time.
Within a few months of consistent practice, hills that once terrified you will become your favorite part of any skating session. Stick with it, and you will get there.