
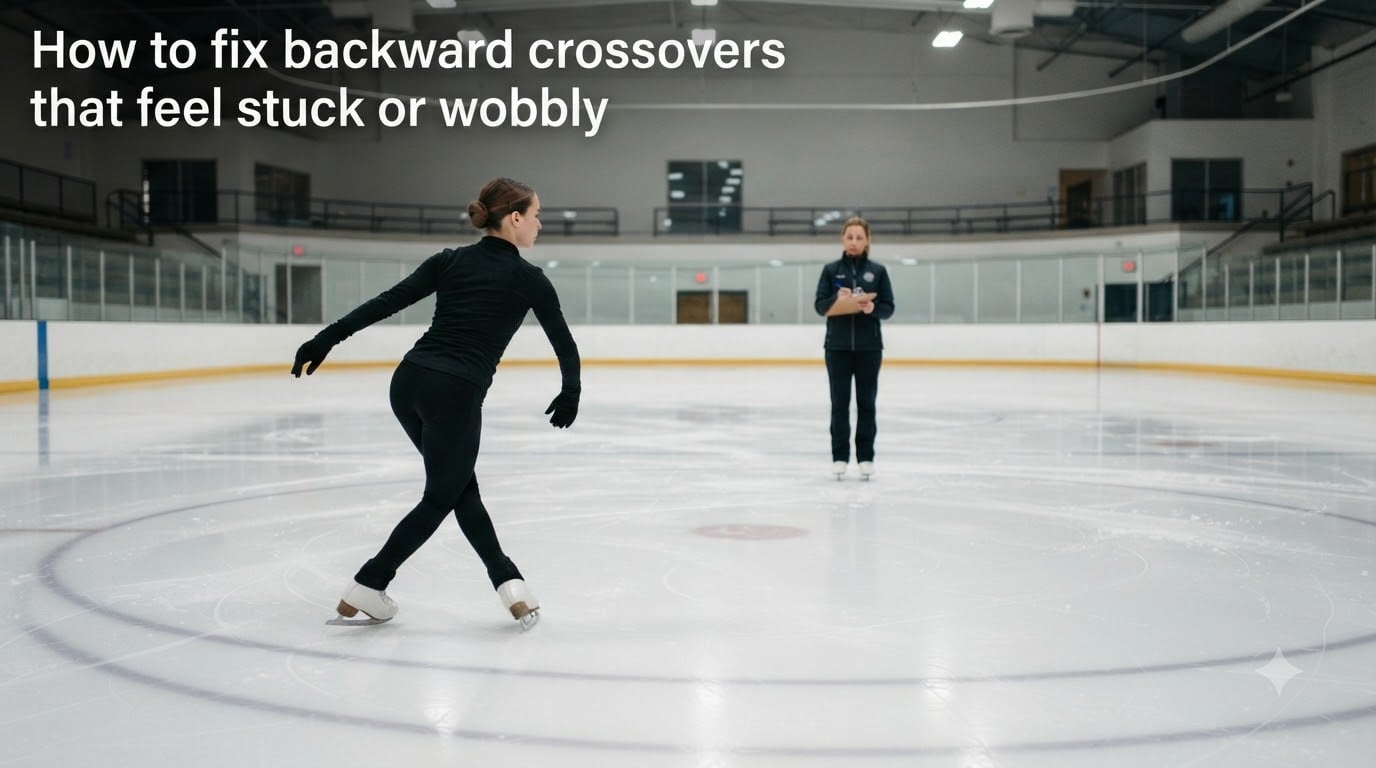
If your backward crossovers feel stuck or wobbly, the problem is almost never the foot crossing over. It is the edge underneath it, the knees above it, and where your eyes are looking. I have coached adult skaters through this exact frustration for years, and the fix is more straightforward than most guides make it.
Backward crossovers look simple from the outside. One foot glides on an edge, the other foot crosses over, and the push underneath sends you forward. When the move feels stuck, the foot refuses to glide. When it feels wobbly, the edge keeps falling out from under you. Both problems trace back to a short list of root causes that we will walk through in this guide.
By the end of this article, you will know exactly which habit is breaking your backward crossovers, how to fix it, and what drills to run this week to feel smooth on the circle. This applies whether you skate on ice or inline, whether you are a figure skater, hockey player, or recreational adult skater.
Table of Contents
Why Backward Crossovers Feel Stuck or Wobbly in the First Place?
Backward crossovers are a skating technique where you cross one foot over the other while moving along a curve, allowing you to build speed and navigate turns. When they work, your outside foot glides on a clean edge while your inside foot crosses over, then the outside foot pushes underneath to generate power.
The “stuck” feeling usually shows up when the foot that should be gliding refuses to glide. The “wobbly” feeling shows up when the foot glides but the edge keeps slipping out. Both are symptoms of the same underlying problem: your weight is not centered over the gliding foot long enough for the edge to set.
Four factors drive almost every backward crossover problem I see. The first is locked knees instead of bent knees. The second is hips and shoulders not aligned to the circle. The third is looking down instead of looking behind. The fourth is crossing the inside foot too early or too late. Start your diagnosis there before blaming your skates.
Prerequisites You Need Before Attempting Backward Crossovers
Most skaters rush to backward crossovers before their backward building blocks are solid. If any of these prerequisites feel shaky, you will save yourself months of frustration by going back to them first.
Backward Stroking and Forward Crossovers
You need solid forward crossovers before backward crossovers will click. The muscle memory for weight transfer and edge control on the inside and outside edges is the same on both directions. If your forward crossovers are inconsistent, fix those first.
Backward stroking is the simple act of pushing out and gliding on one foot, alternating sides. If you cannot stroke backward on a curve without losing your edge, you are not ready for backward crossovers yet.
Backward C-Cuts and Half Swizzles
C-cuts are the foundation of all backward power. Practice them on a straight line first, then move to a circle. Half swizzles (also called pumps) build the rhythm you need for crossovers.
A good test: can you do five backward half swizzles in a row on a circle without looking down or losing balance? If not, spend a session or two on this drill before returning to crossovers.
Gliding on One Foot
Backward crossovers require a long, stable glide on the outside foot. If you can only hold a one-foot glide for a second or two, your edge will not have time to set before you cross. Practice extending that glide to four or five seconds before moving on.
How to Fix Backward Crossovers: Step-by-Step Technique
Here is the exact sequence to follow when you step onto the circle. I will describe it going counterclockwise, so reverse the directions if you skate clockwise.
Step 1: Set Up the Outside Edge
Start by stroking backward into a circle. Your right foot (the outside foot) should glide on a backward outside edge. Your left foot stays slightly behind, ready to push. Bend your knees deeply. Look over your left shoulder, not down at the ice.
Step 2: Cross the Inside Foot Over
Bring your left foot around and place it on the ice just in front of your right foot. The left foot should land on a backward inside edge. This is the “cross” in crossover. Do not push yet.
Step 3: Push With the Outside Foot
Once your left foot is planted, your right foot pushes out to the side. The push should feel like a sideways hook, not a back kick. This push is what generates the speed that makes crossovers feel powerful.
Step 4: Hold the Glide and Look Behind
After the push, your right foot returns to glide in front of the left foot. Hold this glide for at least two seconds. Keep your eyes looking over your shoulder the entire time. Repeat.
Common Problems That Make Backward Crossovers Feel Stuck
These are the four mistakes that produce the “stuck” feeling. If you can identify which one is yours, the fix is usually a single correction.
Locking Your Knees Instead of Bending Them
The problem: When your knees lock, your ankles lose the ability to flex into the edge. The foot slides instead of gripping, and the crossover feels like it is dragging through mud.
The fix: Bend your knees deeply. I tell my students to imagine they are sitting on a low bench. If you can feel your weight dropping into your hips, your knees are doing their job.
Crossing Too Early Before the Edge Sets
The problem: Skaters often try to cross the inside foot the moment they push. The outside edge never has time to set, and the whole move feels rushed and stuck.
The fix: Wait. After the push, hold the outside edge glide for a full count before crossing. The longer you can glide confidently, the smoother your crossovers will feel.
Hips and Shoulders Not Aligned to the Circle
The problem: When your upper body faces backward but your hips face straight down the rink, your edges fight each other. This creates a wobbly, stuck sensation because the body is fighting itself.
The fix: Rotate your hips and shoulders together so they both point toward the center of the circle. Your chest should lead the turn, not your feet.
Not Pushing the Inside Foot Far Enough Over
The problem: The crossing foot lands too close to the gliding foot, leaving no room for the push. The move feels cramped and stuck.
The fix: Cross the inside foot far enough forward that it lands about a blade length in front of the outside foot. This gives the push space to generate power.
Why Backward Crossovers Feel Wobbly (And How to Steady Them)
Wobble comes from the edge slipping out. Here is what causes it and how to lock it down.
Looking Down Instead of Over Your Shoulder
The problem: When you look down at the ice, your head weighs your body forward. Your balance shifts off the gliding foot, and the edge slips out. The crossover suddenly feels wobbly and unstable.
The fix: Look strongly behind you. More behind you than you think you need to. Skaters often underestimate how far back the head should turn. Looking at the boards two feet behind you is not enough. Pick a point on the wall and keep your eyes there.
Standing Too Upright in the Glide
The problem: Standing tall puts your center of gravity high and shifts weight off the edge. The foot wobbles under you.
The fix: Sink into the glide. Bend your knees, hinge slightly forward at the hips, and keep your core engaged. Lower center of gravity equals more stable edges.
Ankles Rolling Instead of Locking Onto the Edge
The problem: When the ankle wobbles side to side, the edge cannot hold. The foot slips in and out, and the crossover feels like it is shaking.
The fix: Press the skate into the ice with intent. Imagine you are trying to leave a single clean track line on the ice. If your track looks wiggly, your ankle is rolling.
Uneven Leg Strength Between Left and Right
The problem: Most skaters have one strong side and one weak side. When you circle in the direction that uses the weak side as the outside foot, the edge wobbles.
The fix: Practice both directions equally. Spend half your circle time on each side. Specific drills for the weak side will close the gap within a few weeks.
Practice Drills to Make Backward Crossovers Smooth
Drills are where backward crossovers actually get fixed. Pick one or two of these for each session and spend 10 to 15 minutes on them before moving to free skating.
Drill 1: Two-Foot Backward Glides on a Circle
Stroke backward into a circle and just glide on two feet, no crossing. Focus on bending the knees and looking behind. This builds the edge awareness you need before adding the cross step.
Drill 2: Backward Half Swizzle Pumps
Stand with feet together and push them out into a V shape, then pull them back together. On a circle, this builds the rhythm of crossovers without the complexity of the cross step.
Drill 3: One-Foot Glide With Free Leg Extension
Glide on the outside foot only and extend the free leg behind you. Hold for five seconds, then switch. This drill builds the edge strength you need for the glide phase of the crossover.
Drill 4: Slow Continuous Crossovers on a Wide Circle
Once the above drills feel stable, do slow crossovers on a wide circle. Wide circles are easier than tight ones, so start wide. Speed comes later.
Mental Blocks and Confidence When Learning Backward Crossovers
Most guides skip this part. The mental side of backward crossovers is real, especially for adult skaters.
Why One Direction Feels Harder Than the Other
Almost every skater has one direction that feels impossible and one that feels fine. This is not a technique problem. It is a mental block. Your brain has not built the same muscle memory for the harder direction, so it panics.
The fix is to drill the hard direction until it feels boring. Repetition is the only way to overwrite the panic response.
Building Confidence by Looking Behind You
Many skaters cannot cross their weak-side foot over because they are terrified of looking in that direction. The fear is real, but the fix is mechanical: practice looking behind you while moving backward long before you try crossing.
Try slow backward half swizzles looking strongly behind you. Once the head turn feels safe, the cross step will follow.
Speed vs Technique: When to Add Speed Without Losing Form
Speed is the reward for good technique, not a substitute for it. Adding speed before your edge is stable amplifies every wobble.
A good rule: if your track lines on the ice are clean circles, you are ready to add speed. If your tracks look like wobbly figure eights, slow down and fix the edge first.
When you do add speed, do it gradually. Increase by about 10 percent per session. Your edges need time to adapt to the higher forces, and rushing this step is how bad habits get cemented.
Frequently Asked Questions
How can I improve my backwards crossovers?
To improve your backwards crossovers, focus on four habits: bend your knees deeply, align your hips and shoulders to the circle, look over your shoulder instead of down, and hold the outside edge glide for a full count before crossing. Practice backward half swizzle pumps and one-foot glides on a circle for 10 to 15 minutes per session before adding real crossovers.
Why do my backward crossovers feel stuck?
Backward crossovers feel stuck when the outside foot cannot hold its edge. The most common causes are locked knees, crossing the inside foot too early before the edge sets, hips and shoulders not aligned to the circle, or not crossing the inside foot far enough forward to give the push room. Bend your knees, wait for the edge, and keep your upper body facing the center of the circle.
Why do my backward crossovers feel wobbly?
Backward crossovers feel wobbly when the edge keeps slipping out. The main causes are looking down at the ice instead of over your shoulder, standing too upright instead of sinking into the glide, ankles rolling side to side, and uneven leg strength between your left and right sides. Look strongly behind you, lower your center of gravity, and press the skate into the ice with intent.
How long does it take to learn backward crossovers?
Most adult skaters need 4 to 8 weeks of consistent practice to feel smooth on backward crossovers. Skating two to three times per week with focused drills on backward half swizzles and one-foot glides will produce faster progress than casual freestyle sessions. The weakness is usually specific (one direction, one phase), and targeted practice shortens the timeline.
Do backward crossovers work the same on ice and inline skates?
Yes, the mechanics of backward crossovers are nearly identical on ice and inline skates. The main difference is that inline skates have a wider wheelbase, which can make balancing slightly easier but can also make the cross step feel more clunky at first. The same four fixes (bent knees, aligned hips and shoulders, looking behind, waiting for the edge) apply to both.
Final Thoughts
Fixing backward crossovers that feel stuck or wobbly is a matter of identifying which of four habits is breaking under pressure. Bend your knees. Wait for the edge. Align your hips and shoulders. Look behind you. Pick the one that is hardest for you and drill it for a week. That single change usually unlocks the rest.
If you want to learn how to fix backward crossovers that feel stuck or wobbly, the next step is simple: pick one drill from this guide and run it for 15 minutes at your next session. Edge work compounds quickly when you focus on it, and within a few weeks you will feel the difference on every circle.