
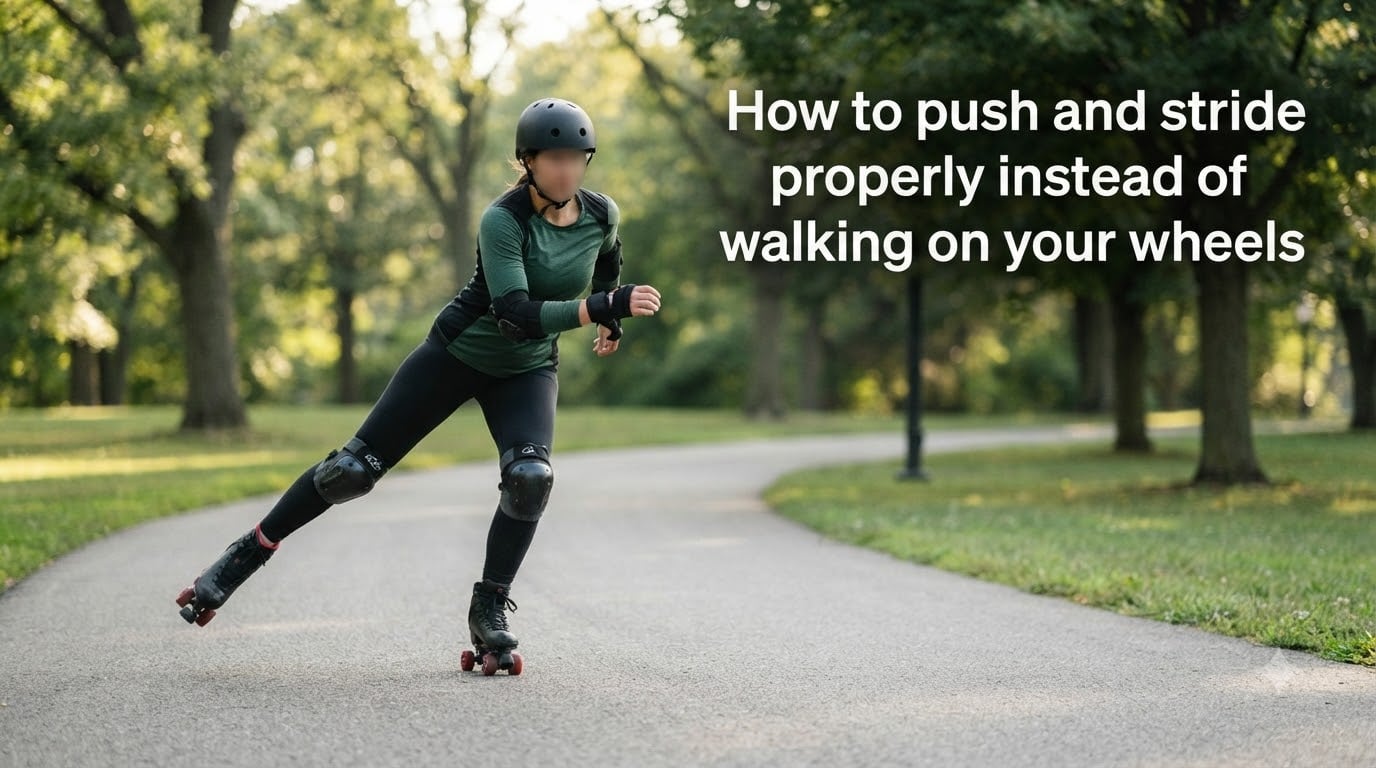
Learning how to push and stride properly instead of walking on your wheels is the single biggest breakthrough every roller skater needs to make. Most beginners default to a walking motion, lifting each foot and stepping forward like they are on solid ground. On wheels, that instinct kills your momentum, drains your energy, and makes you unstable.
I have watched countless skaters struggle with this exact problem. You put your skates on, start moving, and within seconds you are marching in place on eight wheels instead of gliding. The frustration is real, but the fix is entirely learnable. Once you understand what your body should be doing and why walking fails, everything clicks.
This guide breaks down the mechanics of a proper roller skate stride from the ground up. We will cover the T-stand, weight transfer, the push phase, the glide phase, and the mental shift that separates confident skaters from people still marching on their wheels.
Table of Contents
Why Walking on Your Wheels Doesn’t Work?
Walking works on solid ground because friction keeps your foot planted with every step. You push backward against the floor, the floor pushes you forward, and your other foot catches your weight. On roller skates, that backward push sends your foot rolling in whatever direction the wheels are pointed, usually not the direction you want to go.
The walking motion also keeps your weight centered between both feet at all times. That feels safe, but it means neither leg is ever fully committed to a push or a glide. You end up doing rapid, tiny steps with minimal power, burning energy without building speed. Skaters call this “running on your wheels” or “walking on your wheels,” and it is the number one habit that holds beginners back.
Proper striding is fundamentally different. Instead of stepping forward, you push sideways against the inside edge of one wheel. That lateral push converts into forward momentum. Then you balance entirely on the other skate and let it roll, which is the glide. The motion is low, wide, and efficient rather than tall, narrow, and frantic.
Think of it like a speed skater on ice. They never lift their feet high or step forward. They push out to the side, glide on one blade, and then push out again with the other leg. Roller skating uses the same principle, just with wheels instead of blades.
The Mental Barrier: Trusting the Glide
Here is what nobody tells you about learning to stride properly. The technique is not complicated. The hard part is psychological.
When you walk on your wheels, you feel in control because both feet are always close together and ready to catch you. The moment you commit your full weight to one skate and push off with the other, your brain screams that something is wrong. Your support leg is rolling, your pushing leg is extending outward, and for a brief second you are balancing on one foot at speed.
Forum skaters describe this vividly. Beginners say they cannot put weight on one leg without feeling like they will roll away. Intermediate skaters admit they cut their push short, lifting the pushing skate before full extension, because extending fully feels exposed. Over on the r/Rollerskating community, skaters report coming back after a year off and falling right back into the same walking pattern because their muscle memory defaults to what feels safe.
The fix is gradual exposure. You do not need to commit to a full stride on day one. Start by standing on one skate while holding a wall. Then try balancing on one skate while rolling slowly. Build trust in your support leg before worrying about how hard you push. Once your brain accepts that one skate can carry your weight, the stride unlocks naturally.
Master the T-Stand: Your Starting Position
Every proper stride starts from the T-stand, also called the ready position. This is the single most important stance in roller skating, and every competitor in this space covers it because it works.
Here is how to set up your T-stand:
1. Place your front skate pointing straight ahead. Plant it firmly with all four wheels (or all wheels for inline) flat on the ground.
2. Place your back skate perpendicular to the front skate, forming a T shape. The back skate should be behind the front skate, turned roughly 90 degrees so the wheels grip the ground and prevent rolling.
3. Bend both knees slightly. This is critical. Locked knees make you top-heavy and eliminate your ability to push or balance.
4. Shift most of your weight onto the back leg, the one forming the crossbar of the T. That leg is your brake right now, keeping you stationary.
5. Keep your torso upright with your shoulders over your hips. Look forward, not down at your skates.
The T-stand gives you a stable launch position. Your back leg holds you still, and your front leg is ready to receive your weight when you start moving. Practice holding this position for 30 seconds at a time before you ever try to push.
Weight Transfer: The Foundation of Every Stride
Weight transfer is what separates a skater from a walker on wheels. In a walking motion, your weight stays split between both feet. In a proper stride, your weight moves completely from one leg to the other with each push.
Your center of mass needs to be directly over your support leg, which is the leg you are gliding on. If your weight stays behind or between your skates, you will never build momentum. The push will feel weak because your body is not committing forward.
Think of it as falling forward and catching yourself with your stride. Your weight leads, and your skate arrives underneath to support it. This feels scary at first, which is exactly the mental barrier we covered earlier. But without committing your weight fully to the support leg, the push has nothing to push against.
A good drill for weight transfer is the single-leg balance hold. Stand in your T-stand, then slowly shift all your weight onto the front leg. Lift your back skate off the ground and see how long you can hold your balance. If you wobble immediately, your weight was not fully committed. Keep practicing until you can balance on one skate for five seconds without teetering.
The Push Phase: How to Push and Stride Properly
This is the core technique. If you master one section in this guide, make it this one. Here is how to push and stride properly instead of walking on your wheels.
Step 1: Start in your T-stand. Weight on the back leg, front skate pointing where you want to go, knees bent, torso upright.
Step 2: Shift your weight fully onto the front leg. This front leg becomes your support leg. Your center of mass should be directly over it, not leaning back or straddling both skates.
Step 3: Push with the back leg. This is where most beginners go wrong. Do not push backward like you are walking. Push outward to the side, pressing against the inside edge of your wheels. The push should extend your leg fully, like you are sweeping the floor sideways with the inside of your skate.
Step 4: Push at an angle, not straight back. The lateral push is what converts your effort into forward motion. A backward push rolls your skate away and wastes energy. Aim for a 45-degree angle outward from your direction of travel.
Step 5: Extend fully before lifting. Your pushing skate should travel out to the side until your leg is almost straight. Only then do you lift it off the ground. Cutting the push short is one of the most common mistakes, and it happens because lifting the foot early feels safer than committing to full extension.
Step 6: Regroup under your body. After the push, bring that skate back underneath your center of mass. It now becomes your new front skate, ready to receive your weight as you transfer and push with the other leg.
The rhythm is push, glide, regroup, transfer, push, glide, regroup, transfer. It is a continuous cycle, not a series of discrete steps. Once your muscle memory locks it in, the motion becomes fluid and almost meditative.
For visual learners, this tutorial from an established skating instructor walks through the push, glide, and regroup sequence step by step: Tutorial: How to roller skate correctly for beginners.
The Glide Phase: Letting the Skate Do the Work
The glide is the reward for a good push. Once your pushing leg extends and you have transferred all your weight to the support leg, you should be rolling forward on one skate. That roll is your glide, and it is where skating becomes efficient.
Beginners often skip the glide entirely because balancing on one skate at speed feels unnatural. They immediately start pushing with the other foot before the first push has finished working. The result is a choppy, high-frequency stepping pattern that looks and feels like running on wheels.
Instead, hold the glide. Let yourself roll on one skate for a full second or two before starting the next push. The longer your glide, the more ground you cover with less effort. Elite skaters spend a significant portion of each stride in the glide phase, and they make it look effortless because they have trained their balance to handle it.
Your glide leg should have a slightly bent knee. This keeps your center of mass low and gives you a shock absorber for small bumps and cracks. A locked knee during the glide is a recipe for instability and falls.
Common Mistakes When You Walk on Your Wheels
Identifying your mistakes is the fastest way to fix them. Here are the most common errors that keep skaters stuck in a walking pattern:
1. Pushing backward instead of sideways. This is the classic walking reflex. You push back, the skate rolls back, and you get almost no forward propulsion. The fix is to consciously push out to the side at a 45-degree angle.
2. Not bending your knees enough. Locked or barely bent knees raise your center of mass and make every movement harder. Drop into a shallow squat. You should feel your thighs working.
3. Lifting the pushing skate too early. Many skaters lift before full extension because it feels controlled. This robs you of push power. Force yourself to extend fully before regrouping.
4. Keeping weight between both feet. If your weight never fully commits to one leg, your push has no foundation. Practice single-leg balance until committing your weight feels normal.
5. Stomping instead of gliding. Some skaters push correctly but never hold the glide. They immediately stomp the other foot down. Practice pausing on one skate between each push.
6. Looking down at your feet. Your body follows your eyes. Looking down shifts your weight forward and breaks your posture. Pick a point 10 to 20 feet ahead and fix your gaze there.
7. Over-pushing for power. More advanced skaters sometimes try to push too wide or too hard, reaching for extra stride length. This pushes the body laterally instead of forward and wastes energy. The fix is keeping pushes controlled and efficient, letting glide time do the work.
Practice Drills to Build Muscle Memory
Muscle memory is what makes striding feel automatic. You cannot think your way through a stride at speed. You have to train the movement until it happens without conscious effort. Here is a progression that takes you from total beginner to confident strider.
Drill 1: Wall-supported single-leg balance (5 minutes). Find a wall or railing. Hold it, then shift all your weight to one skate and lift the other. Hold for 10 seconds, switch sides. Repeat until it feels easy. This builds trust in your support leg.
Drill 2: Stationary pushes against a wall (5 minutes). Stand sideways next to a wall, holding it with one hand. Push off gently with the outer leg, extend fully, and regroup. Focus on the lateral push direction and full extension. Do 10 reps per side.
Drill 3: Stride walks (10 minutes). This is the bridge between walking and skating. Take one push, glide on the support leg, then stop and reset. Do not link strides yet. The goal is a clean single push with a held glide. Repeat for the length of a parking lot or empty rink.
Drill 4: Linked strides with extended glide (10 minutes). Now connect pushes, but force yourself to hold each glide for a slow count of two before pushing again. The rhythm should feel slow and deliberate, not rapid. Speed comes later. Control comes first.
Drill 5: Increasing stride length (10 minutes). Once linked strides feel stable, gradually increase how far you push out to the side and how long you glide. Monitor for quality. If you start walking again, slow down and reset.
Do this sequence three to four times per week. Most skaters see noticeable improvement within two weeks, and the walking pattern starts fading within a month of consistent practice.
Balance and Posture Tips That Make Striding Easier
Good posture makes every aspect of striding easier. Here are the pointers that make the biggest difference:
Drop your hips. A lower center of mass means more stability and a stronger push. Think of sitting back slightly into a chair. Your thighs should be engaged, not locked.
Keep your shoulders over your knees. If your shoulders drift behind your hips, your weight shifts backward and your push loses power. Lean slightly forward from the ankles, not the waist.
Use your arms for counterbalance. Let your arms swing naturally in opposition to your legs. Right leg pushes, left arm swings forward. This mirrors natural walking mechanics and helps stabilize your torso.
Wear proper safety gear. A helmet, knee pads, elbow pads, and wrist guards do more than protect you. They reduce fear, and reducing fear is the key to committing fully to your pushes and glides. Skaters who feel protected push harder and hold glides longer.
Frequently Asked Questions
How to stride on roller skates?
To stride on roller skates, start in a T-stand with your weight on the back leg. Shift your weight fully onto the front leg, push outward to the side with the back leg at a 45-degree angle, extend fully, then glide on your support leg. Bring the pushing skate back under your body and repeat with the other leg.
How to push in roller skates?
Push outward to the side using the inside edge of your wheels, not backward like walking. The push should extend your leg almost fully before you lift the skate. Push at roughly a 45-degree angle from your direction of travel to convert the lateral effort into forward momentum.
Why do I walk on my roller skates instead of gliding?
Walking on roller skates happens because your brain defaults to a safe, familiar motion where both feet stay close together. Proper striding requires committing all your weight to one leg, which feels exposed. The fix is building single-leg balance through drills until your brain trusts the glide.
How to stay balanced on roller skates?
Bend your knees to lower your center of mass, keep your shoulders over your hips, look forward instead of down, and practice standing on one skate at a time. Wearing full safety gear also reduces fear, which helps you commit your weight fully and maintain better balance.
What are common roller skating mistakes?
The most common mistakes are pushing backward instead of sideways, not bending the knees enough, lifting the pushing skate before full extension, keeping weight split between both feet, skipping the glide phase, and looking down at your feet instead of forward.
Conclusion
Learning how to push and stride properly instead of walking on your wheels comes down to two things: understanding the mechanics and trusting your body to execute them. The T-stand sets your foundation. Weight transfer commits your energy to each stride. The lateral push generates forward motion, and the glide lets you ride that momentum efficiently.
The walking pattern is not a talent problem. It is a habit problem, and habits can be rewired with targeted drills. Start with wall-supported balance work, progress through stride walks, and build up to linked strides with extended glides. Within a few weeks of consistent practice, the walking motion fades and real skating begins.
Grab your gear, find a flat empty surface, and start with drill one. Every confident skater you see was once exactly where you are right now.