
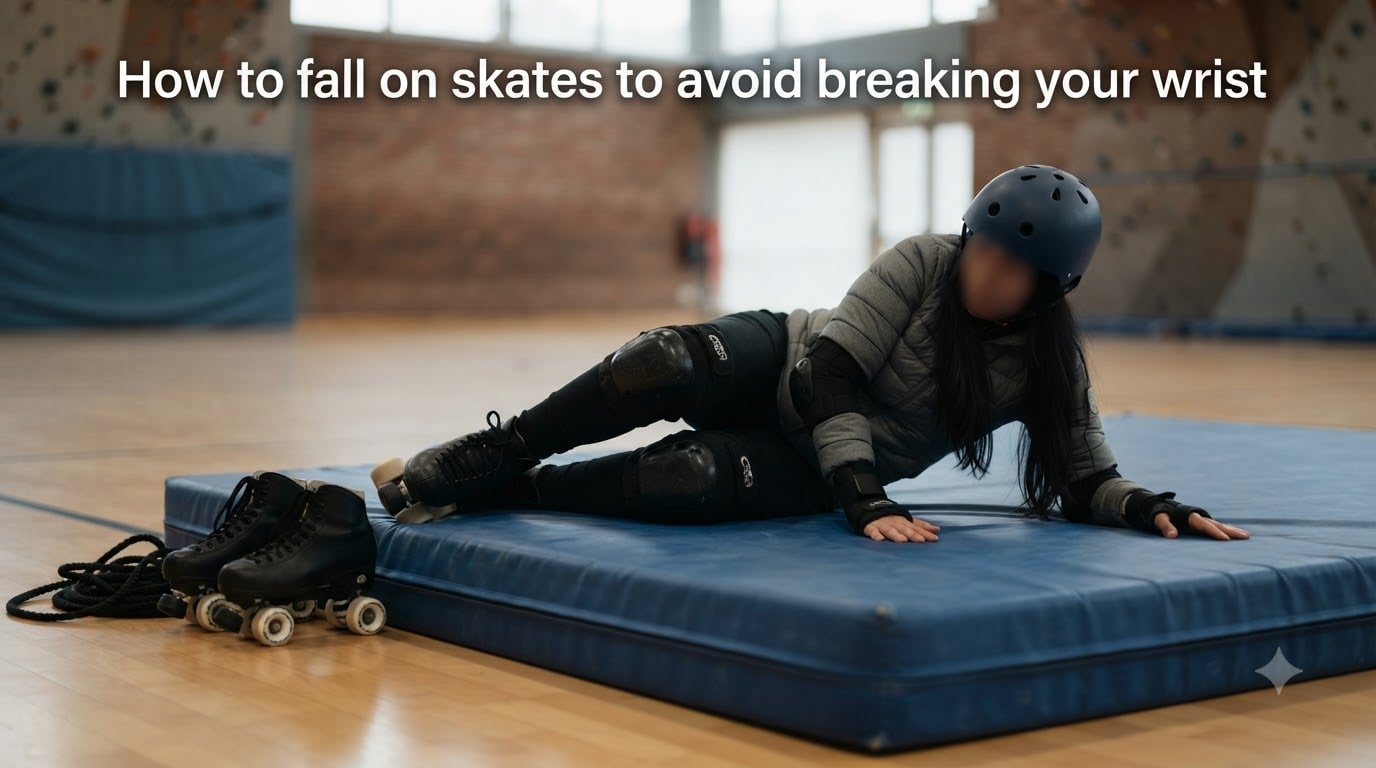
The safest way to fall on skates to avoid breaking your wrist comes down to five things: bend your knees to get low, fall to your side or hip instead of forward or backward, tuck your chin to protect your head, keep your hands in fists or flat against your body, and try to relax rather than stiffen up. That combination distributes impact across padded areas like your hip and thigh instead of concentrating all that force into your wrist bones. If you only remember one thing, remember this: never reach out with an open hand to catch yourself.
I have spent years skating, coaching beginners, and reading hundreds of forum posts from skaters who learned this lesson the hard way. Wrist fractures are the single most common skating injury, and nearly every one of them happens the same way. The good news is that once you understand why wrists break and how to redirect that force, falling becomes something you can manage instead of fear.
This guide breaks down the physics behind wrist injuries, walks through the exact falling technique step by step, covers how to get back up safely, and addresses the mental side of falling that most guides skip entirely.
Table of Contents
Why Wrist Injuries Are the Most Common Skating Fall?
Wrist injuries dominate skating emergency room visits for one simple reason: human instinct. When you start to fall, your brain sends an automatic signal to shoot your arms out and break the impact with your hands. Every skater does it, especially beginners.
The problem is what happens next. Your wrist is a complex joint made up of eight small carpal bones, and when you land on an outstretched palm, all of your body weight plus the momentum of the fall gets channeled through that narrow area. The force has nowhere to go but through those small bones. That is how a simple loss of balance turns into a fracture.
I have read story after story on Reddit from skaters who broke a wrist within their first month. One user shared how they injured themselves three separate times in their first weeks at 46 years old because they never learned proper falling technique. Another heartbreaking post described two young skaters who broke their arms even while wearing wrist guards, which proves a point I will come back to: gear helps, but technique is what actually prevents fractures.
The Force Transmission Problem
Think about it like this. If you weigh 150 pounds and fall from a standing height, that energy has to go somewhere. When you land on the meaty part of your hip or thigh, that energy spreads across a wide, muscular, padded area. When you land on a flat palm with a straight arm, all of that energy funnels through your wrist joint and into the radius bone.
The angle matters too. A slightly bent wrist under load can buckle, and a fully extended wrist under sudden impact can snap the radius where it meets the hand. This is why doctors and physical therapists specifically warn against reaching out to catch yourself.
Forward Falls Versus Backward Falls
Forward falls tend to cause wrist and arm injuries because you naturally throw your hands out. Backward falls tend to cause tailbone and head injuries instead, which is why protecting your head by tucking your chin is so important. Both directions are dangerous, but the technique for falling safely to your side addresses both scenarios.
The 5 Core Techniques to Fall Safely on Skates
Learning how to fall safely on skates means retraining your body to do the opposite of what instinct tells you. These five techniques work together as a system. You will not always have time to execute all five perfectly, but drilling them builds muscle memory so your body defaults to safe positions.
1. Bend Your Knees to Lower Your Center of Gravity
The lower you are to the ground, the shorter the distance you fall. That means less force on impact. Bent knees also give you more stability and a wider base, which can prevent the fall entirely. A skater skating upright with locked knees is a fall waiting to happen.
Keep your knees soft and slightly bent at all times. When you feel balance slipping, bend deeper. Getting low is your first line of defense.
2. Fall to Your Side or Hip, Never Forward or Backward
This is the single most important technique for protecting your wrists. When you feel yourself going down, rotate your body so you land on the side of your hip or thigh. That area is padded with muscle and fat, and it can absorb impact far better than your wrist, tailbone, or head.
Falling forward leads to hands-out instinct and wrist fractures. Falling backward leads to tailbone and head injuries. The side hip landing is the safe middle ground.
3. Tuck Your Chin to Protect Your Head
Head injuries are rare in skating but serious when they happen. The moment you start to fall, pull your chin toward your chest. This curls your spine slightly and keeps your head from whipping backward into the ground.
Think of it as giving yourself a slight crunch. Your chin comes down, your shoulders round forward slightly, and your head stays protected behind the curve of your upper body.
4. Keep Your Hands in Fists or Flat Against Your Body
This is the technique that directly prevents wrist fractures. Instead of letting your hands fly out, consciously pull them in. Make fists and bring them to your chest, or press your palms flat against your thighs or torso. The goal is to make it physically impossible for your hands to reach the ground first.
This feels completely unnatural at first. That is normal. Every skater has to unlearn the instinct to catch themselves with open hands. Practice it enough and it becomes automatic.
5. Relax Instead of Tensing Up
A stiff body breaks. A relaxed body bounces and slides. When you tense up during a fall, your locked muscles and joints absorb all the impact force, which is exactly how bones snap.
Relaxing into the fall lets your body roll, slide, or crumple in a way that distributes energy. Drunk people walk away from terrible falls partly because they are completely loose. You want controlled relaxation, not rigidity.
How to Fall on Skates: Step-by-Step the Right Way
Here is how the five core techniques come together in real time when you lose balance on skates. Read through these steps, then practice them on carpet or grass before you ever need them at speed.
Step 1: Spot the loss of balance early. Most falls give you a split second of warning. Your weight shifts, a wheel catches, or you feel that wobble. The earlier you recognize it, the more time you have to execute technique.
Step 2: Drop your hips and bend your knees. Get as low as you can. This reduces fall distance and sets you up to rotate to your side. Think of it as sinking into a squat.
Step 3: Rotate to your side. Turn your body so your hip and thigh face the ground. This is the move that keeps you off your wrists and off your tailbone. Commit to the side.
Step 4: Tuck your chin and pull your hands in. Bring your chin to your chest. Make fists and hold them against your body. Do not reach for the ground.
Step 5: Slide or roll to absorb impact. Let your body hit the ground on the padded side of your hip and slide or roll with the momentum. Stay loose. Let the energy dissipate through your thigh, hip, and the curve of your shoulder if needed.
If you execute these five steps, the worst outcome is usually a bruise on your hip. Compare that to a broken wrist that keeps you off skates for six weeks.
Getting Back Up Safely After a Fall
Falling is only half the battle. Getting back up on skates can feel awkward, especially for beginners, and doing it wrong can lead to a second fall. Here is the method experienced skaters teach.
Step 1: Get to hands and knees. Roll onto all fours. Keep your weight centered. Take a breath and check that nothing hurts seriously before you try to stand.
Step 2: Position one skate under you. Bring one foot forward so the skate is flat on the ground beneath your body. This will be your pushing foot.
Step 3: Push up to a kneeling position. With one foot planted and the other knee on the ground, use your planted leg to lift your weight. Keep your hands on the ground for balance.
Step 4: Stand up with control. Push through your planted foot and rise slowly. Keep your knees bent. Do not pop straight up with locked legs, or you will wobble and possibly fall again.
If you are on inline skates or ice skates, getting up takes even more care because the surface is slippery. Take it slow and stay low until you feel balanced.
Practice Drills: Learn to Fall Before You Skate
This is the step almost no beginner takes, and it is the one that makes the biggest difference. You can and should practice falling technique before you ever lace up skates. Forum skaters consistently recommend this, and I agree completely.
Carpet Drills at Home
Put on thick clothes and find a carpeted area. Stand in a skating stance with knees bent. Slowly lower yourself to one side, practicing the hip-landing position. Do this twenty times. Your goal is to make the side-fall position feel familiar instead of foreign.
Then add the hand position. Every time you go down, consciously make fists and pull them to your chest. Repetition builds the muscle memory that will override your instincts on the rink.
Grass Falling Practice
Once the carpet feels easy, take it outside. Grass provides a soft surface to practice real falls at speed. Put on your skates on grass where the wheels will not roll freely, and practice losing balance and falling to your side. The soft ground lets you build confidence without injury risk.
Gradual Exposure on Skates
When you finally skate on a hard surface, start slow. Skate in a controlled area at low speed. Accept that you will fall, and mentally rehearse your technique before you start moving. Every fall you take while using proper technique reinforces the right habits.
Protective Gear That Actually Helps
I want to be honest about gear because there is a lot of misinformation out there. Wrist guards are useful, but they are not a guarantee against fractures. A piece of plastic strapped to your wrist cannot prevent a break if the impact is heavy and the angle is wrong. I have read about two skaters who broke arms while wearing wrist guards, which proves gear alone is not enough.
That said, protective gear is still worth wearing, especially for beginners.
Wrist Guards: Helpful but Not Bulletproof
Wrist guards do reduce scrapes and road rash when you slide. They provide some impact protection and can prevent minor fractures. But they work best when combined with proper falling technique. Never assume wrist guards alone will save you.
Helmet, Knee Pads, and Crash Pants
A helmet is non-negotiable for any beginner. Knee pads make forward falls onto your knees much safer, and they give you a safe landing surface if you do fall forward intentionally. Crash pants with hip and tailbone padding protect the areas you are trying to land on during a side fall.
Together, this gear gives you multiple layers of protection. Technique prevents most injuries. Gear prevents the ones your technique misses.
Overcoming the Fear of Falling
Here is something most guides completely ignore: the mental side of falling. I have seen adults quit skating entirely because of fear, not because of actual injuries. One forum thread after another features adult skaters saying the same thing: fear of falling is the single biggest barrier to their progress.
This fear is completely valid. Falls hurt, and as adults we have jobs and responsibilities that make injuries genuinely disruptive. But letting that fear freeze you actually makes falls more likely, because a tense, rigid skater falls harder than a relaxed one.
Reframe Falls as Learning
Every experienced skater falls regularly. It is not a sign of failure. It is part of the process. The goal is not to avoid falling entirely but to fall safely and get back up. Once you accept that falls will happen, the fear loses its grip.
Build Confidence Progressively
Do not jump into a crowded rink on day one. Start on carpet, then grass, then a quiet sidewalk, then a rink. Each environment builds confidence. Each safe fall you walk away from proves to your brain that falling does not have to mean injury.
One skater on Reddit put it perfectly: experienced skaters do not fall less, they fall better. That is the goal.
When to Seek Medical Attention After a Skate Fall
Most falls result in bruises and soreness that fade in a few days. But some falls need medical attention, and knowing the difference matters.
Seek immediate medical care if you experience any of the following after a fall:
Visible deformity in your wrist, arm, or hand. If something looks bent or out of place, do not try to move it. A visible deformity almost always means a fracture or dislocation.
Persistent numbness or tingling in your fingers or hand. This can indicate nerve damage or swelling that is compressing nerves. Numbness that does not resolve within minutes needs evaluation.
Inability to move the joint or bear any weight on your hand. If you cannot make a fist, grip an object, or rotate your wrist without sharp pain, you likely have a fracture that needs imaging.
Severe swelling that worsens over time. Some swelling is normal after impact, but swelling that keeps increasing after the first hour or is accompanied by discoloration and intense pain suggests a more serious injury.
When in doubt, get it checked. A minor fracture that goes untreated can heal incorrectly and cause long-term problems. The RICE method (rest, ice, compression, elevation) helps with minor sprains and bruising, but it is not a substitute for professional evaluation when something feels wrong.
Frequently Asked Questions
How to avoid breaking your wrist when skating?
To avoid breaking your wrist when skating, never reach out with open hands to catch yourself. Instead, bend your knees, fall to your side or hip, tuck your chin, keep your hands in fists against your body, and try to relax. Practicing this technique on carpet or grass before skating builds the muscle memory needed to override your instincts.
What is the safest way to fall on skates?
The safest way to fall on skates is to your side or hip. Lower your center of gravity by bending your knees, rotate your body so the padded side of your hip faces the ground, tuck your chin to protect your head, pull your hands in against your body, and let your body slide or roll to absorb the impact. Never fall forward onto your hands or backward onto your tailbone.
Can you skate with a broken wrist?
No, you should not skate with a broken wrist. Skating requires balance and the ability to protect yourself during a fall, both of which are compromised with a wrist fracture. Wait until a doctor confirms the bone has fully healed and you have regained full strength and range of motion before returning to skates.
Do wrist guards actually prevent broken wrists?
Wrist guards help reduce scrapes and can prevent some fractures, but they do not guarantee protection. Heavy impact at the wrong angle can still cause a break even with guards on. Wrist guards work best when combined with proper falling technique, which is the real key to preventing wrist injuries.
How do I get back up after falling on roller skates?
Roll onto your hands and knees first. Bring one foot forward with the skate flat on the ground beneath you. Push through that planted foot to rise to a kneeling position, then stand up slowly with your knees bent. Take your time and stay low until you feel balanced before moving again.
Final Thoughts on Falling Safely
Learning how to fall on skates to avoid breaking your wrist is not about avoiding falls altogether. It is about training your body to do the opposite of what instinct demands. Bend your knees, fall to your side, tuck your chin, keep your hands in, and stay loose. Practice those moves on soft surfaces until they feel automatic.
Every skater falls. The ones who stay healthy are the ones who fall well. Gear helps, but technique is what actually keeps your wrists intact. Start slow, build confidence, and remember that each safe fall proves to your brain that falling does not have to mean injury. See you at the rink.