
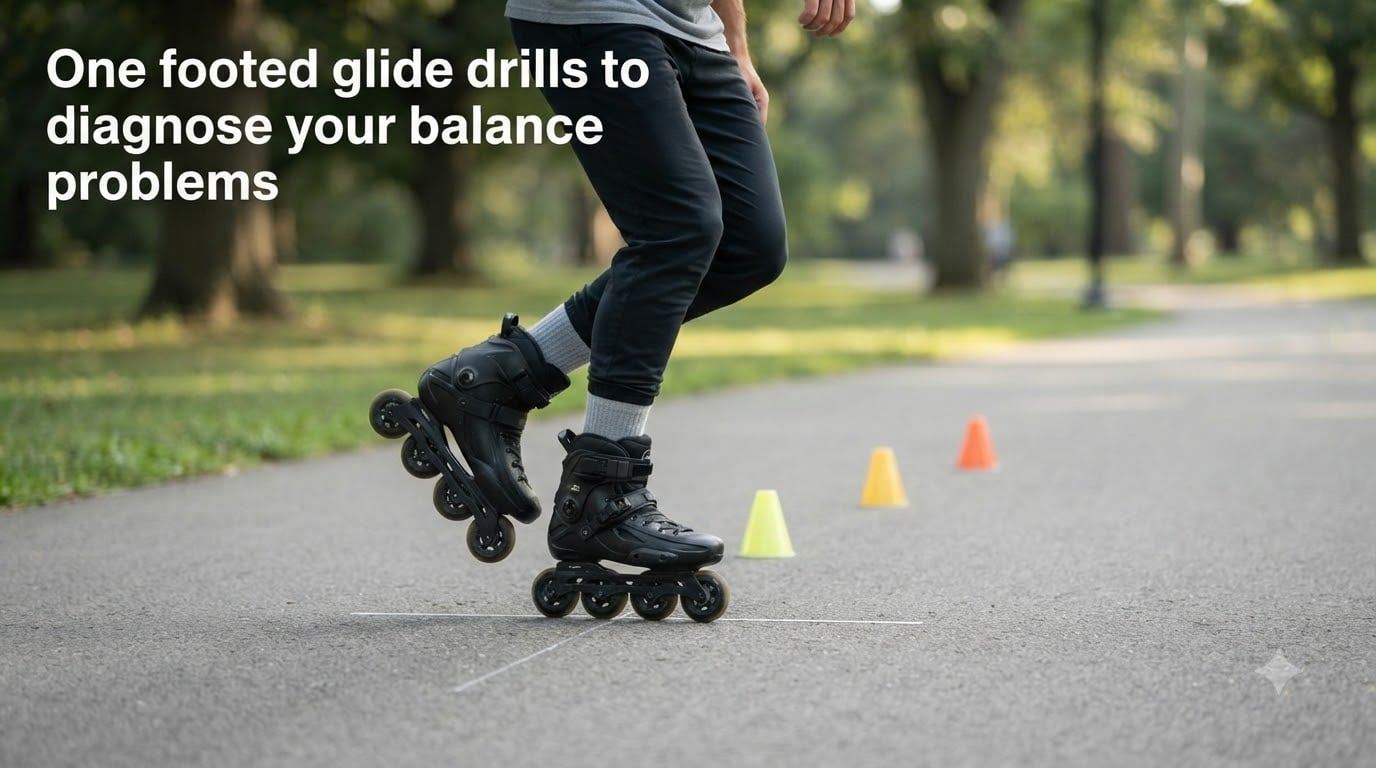
One footed glide drills are the single most revealing diagnostic tool in skating. When you lift one foot and try to roll straight, every weakness in your balance system gets exposed at once. Your weight distribution, alignment, core stability, and ankle strength all show their true colors within seconds.
If you have ever felt like you skate fine on one foot but wobble uncontrollably on the other, you are not imagining things. Most skaters have a dominant foot and a weaker support foot. The gap between them tells you exactly what to work on.
Our team has spent years coaching beginners and intermediate skaters through balance plateaus. The same problems come up every time: unintentional turning, inward-dropping knees, and the feeling that speed is the only thing keeping you upright. One footed glide drills diagnose all of these issues fast.
In this guide, you will learn how to run a complete balance self-assessment using one footed glide drills. I will walk you through the Nose-Knee-Toes alignment technique, a step-by-step diagnostic test, and a troubleshooting system that maps your symptoms to their root causes.
By the end, you will know exactly which balance problems you have, which foot needs work, and what drills will fix them. No guesswork involved.
Table of Contents
What One-Footed Glide Drills Reveal About Your Balance?
One footed glide drills expose what your body does when it can no longer hide behind two-foot stability. The moment one skate lifts, your entire balance system has to compensate. Every habit you have built, good or bad, becomes visible.
Think of one footed glide drills as an X-ray for your skating technique. A straight, long glide on each foot tells you your weight distribution is even and your alignment is correct. A short, curved, or wobbly glide tells you something specific is off.
The three things one footed glide drills reveal are weight distribution problems, alignment breakdowns, and left-right asymmetries. Each symptom points to a different root cause that we will cover later in this guide.
Static balance is when you stand still on one foot. Dynamic balance is when you move on one foot. Many skaters have decent static balance but fall apart dynamically. This is because moving adds speed, momentum, and edge control demands that standing still never tests.
As one skater on the r/inline skating forum put it: “I can stand on one foot stationary just fine, but with one-foot glides I start turning in a tight circle.” This is the most common complaint we see, and one footed glide drills diagnose exactly why it happens.
The Nose-Knee-Toes Alignment Technique
Nose-Knee-Toes alignment is the foundation of every successful one footed glide. Without it, no amount of muscle or speed will keep you balanced. This technique stacks your body weight directly over your support skate.
The concept is simple: your nose, your support knee, and your skate toes should all line up vertically when viewed from the side. This creates a single column of weight that travels straight down through your blade or wheel into the ground.
Proper Body Positioning for Alignment
Start by bending your support knee. Not a shallow bend, a real athletic bend where your knee tracks over your toes. This lowers your center of gravity, which immediately improves stability.
Next, lean your torso slightly forward so your nose moves over your support knee. Most beginners lean backward when they feel off-balance, which pulls weight off the skate and makes everything worse. Fight that instinct.
Keep your shoulders level and squared forward. Dropping one shoulder tilts your center of gravity sideways and starts the turning problem. Your hips should face straight ahead, not rotated inward or outward.
Your free foot, the one lifted off the ground, should stay close to your support skate. Do not let it swing wide or cross behind you. Keep it tucked with the heel near your support ankle.
Why Alignment Controls Glide Direction
When your Nose-Knee-Toes column is straight, your weight pushes straight down through the center of your skate. The skate rolls forward in a line.
When alignment breaks, weight shifts to one edge. That edge bites into the surface and carves a curve. This is why poor alignment causes turning, not weakness.
Fix the alignment first. Strength and glide distance will follow naturally once your body is stacked correctly over your skate.
Step-by-Step: The Basic One-Foot Balance Test
This is the core diagnostic drill. Do it on both feet and record what happens. The results will tell you exactly where your balance breaks down.
Find a flat, smooth surface with room to roll forward at least 20 feet. An indoor rink or smooth outdoor bike path works well. Mark a starting line with chalk or a cone so you can measure glide distance.
Here is the step-by-step protocol:
Step 1: Start rolling forward at a comfortable skating speed. Not fast, not slow. A light push with both feet on the ground will give you enough momentum.
Step 2: Shift all your weight onto your right foot. Press your hip, knee, and ankle directly over the right skate.
Step 3: Lift your left foot slowly off the ground. Keep it tucked near your right ankle.
Step 4: Set your body into Nose-Knee-Toes alignment. Bend the support knee, lean slightly forward, square your shoulders.
Step 5: Glide for as long as you can. Count the seconds. Note whether you travel straight or curve.
Step 6: When you lose balance or put the foot down, stop. Record three things: glide time in seconds, glide direction (straight, left curve, right curve), and how it felt (wobbly, stable, shaky).
Step 7: Repeat on your left foot. Push off, shift weight left, lift right foot, glide, and record the same three measurements.
Do at least three trials per foot and average the results. The comparison between your left and right foot will reveal your asymmetry.
Drill Progression: From Static to Dynamic Balance
Do not jump straight to full-speed one footed glides if you are struggling. Build up through four progression levels. Each level prepares you for the next one.
This progression system comes from a structured approach to one-foot skating that breaks the skill into manageable pieces. Skipping levels is why so many skaters plateau.
Level 1: Stationary One-Foot Balance
Stand still on your skates. Shift all weight to one foot and lift the other. Hold for 10 seconds without wobbling. This trains your ankle and core stabilizers without the added challenge of movement.
If you cannot hold 10 seconds on each foot, you are not ready for moving glides yet. Practice this daily until 10 seconds feels easy on both sides.
Level 2: Scooter Pushes on a Line
Draw or imagine a straight line on the ground. Keep your support skate on the line. Use your free foot to do small scooter pushes, then lift it and glide for 2-3 seconds. Push, glide, push, glide.
This drill teaches your body what it feels like to balance on one foot while moving. The short glide duration keeps it manageable. Stay on the line the whole time.
Level 3: Extended One-Foot Glide
Build up speed with several pushes from both feet. Then shift to one foot and extend the glide as long as possible. Aim for 5 seconds, then 10, then 15.
Track your distance. Use a landmark or count strides when you return to two feet. This is where you start diagnosing direction problems because longer glides amplify any curve.
Level 4: One-Foot Glide Between Cones
Set up two cones 15 feet apart. Glide on one foot from the first cone to the second. This adds a target distance and forces you to maintain balance with precision.
If you can do this on both feet without curving, your one-footed glide balance is solid. Move cones farther apart to keep challenging yourself.
Left vs Right Foot: Identifying Your Asymmetry
Almost every skater has a dominant foot and a weak foot. The difference between them is your balance asymmetry. Identifying it is the whole point of one footed glide drills.
Your dominant foot is the one you naturally push with. It is stronger and more stable. Your support foot, the one you balance on while pushing, is usually weaker.
Here is the problem: if you always push with the same foot, your dominant leg gets stronger while your support leg stays weak. Over time, the gap widens.
How to Measure Your Asymmetry
Run the basic one-foot balance test from earlier on both feet. Compare three metrics:
First, compare glide time. If your right foot glides for 12 seconds and your left for only 5 seconds, your left foot is significantly weaker. A difference of more than 2-3 seconds indicates a meaningful imbalance.
Second, compare glide direction. If one foot glides straight and the other curves, the curving foot has an alignment or edge control problem that the straight foot does not.
Third, compare how each foot feels. Wobbling, shaking, or ankle instability on one side but not the other reveals a strength deficit in the weaker foot.
What to Do About the Findings
If your asymmetry is large, spend extra time on the weak foot. Do twice as many drills on the weak side as on the strong side. Your goal is to equalize both feet until you barely notice the difference.
As the Get Rolling skating resource explains: “To be a balanced skater, you need to work on equalizing your balance and strength until you hardly notice the difference between either foot.”
One way to force this equalization is to switch your push foot temporarily. If you always push right, start pushing left for an entire session. It will feel terrible at first, but that is exactly the work you need.
Common Balance Problems Diagnosed by Glide Tests
One footed glide drills diagnose specific problems based on what happens when you try to balance. Here is a symptom-to-cause mapping you can use immediately.
Symptom 1: Turning in Tight Circles
If you curve when gliding on one foot, your weight is not centered over the skate. Weight on the inside edge makes you turn inward. Weight on the outside edge makes you turn outward.
This is the number one complaint on skating forums. The fix is alignment correction, not strength training. Get your Nose-Knee-Toes column straight and the turning stops.
Symptom 2: Free Leg Swinging Inward
If your lifted leg drifts inward across your body, your hip is rotating. This pulls your entire alignment off-center and starts the turning chain reaction.
The fix is to actively hold the free foot tucked near the support ankle. Do not let it cross your center line. Practice in front of a mirror to see what your leg is actually doing.
Forum members frequently report this. One common observation is that the inward swing feels natural but is actually a compensation pattern your body has developed to deal with instability.
Symptom 3: Cannot Balance Without Speed
If you can only glide on one foot when moving fast, you are using momentum to mask weakness. Speed creates gyroscopic stability that hides balance deficits.
This means your static balance is underdeveloped. Go back to Level 1 of the progression. Build stationary one-foot balance until 10 seconds is easy. Then rebuild the dynamic drills from there.
Symptom 4: Ankle Wobbling or Collapsing
If your support ankle rolls inward or shakes during a glide, your ankle stabilizer muscles are weak. This is common in beginners whose skating muscles have not developed yet.
Off-skate balance training helps here. Practice standing on one foot on solid ground daily. Add single-leg squats and calf raises to build the muscles that stabilize your ankle inside the skate boot.
Symptom 5: Short Glide Distance on One Foot Only
If one foot glides significantly shorter than the other, that foot has either a strength deficit or a technique flaw. Run the asymmetry test to determine which.
If the weaker foot also curves or wobbles, it is a technique problem rooted in alignment. If it goes straight but just does not last, it is a pure strength issue.
Troubleshooting: Why You Turn in Circles
Turning in circles during a one-footed glide deserves its own section because it is by far the most common problem. Almost every skater experiences it at some point.
The cause is always the same: weight distribution is off-center on the skate. Your body weight is pressing on one edge instead of rolling flat. That edge carves a curve into the surface.
Here is how to fix it, in order:
First, check your knee bend. A straight support knee forces your weight backward, which shifts pressure to the back wheels and causes unpredictable turning. Bend the knee deeply.
Second, check your torso angle. If you lean back, your weight moves off the skate center. Lean slightly forward to stack your nose over your knee.
Third, check your hip position. If your hip drops toward the inside, weight transfers to the inside edge. Keep your hips level and squared forward.
Fourth, check your free foot. If it swings wide or crosses behind, it acts like a rudder and steers you. Keep it tucked tight against your support ankle.
Fifth, practice on a painted line. Glide directly on the line. If you drift off, you know your alignment is still off. The line gives instant visual feedback that a blank surface cannot.
One Reddit skater described this perfectly: “I can stand on one foot stationary just fine, but with one-foot glides I start unintentionally turning in a tight circle.” The stationary balance is fine, but the alignment breaks once speed is added. Fix the alignment, fix the circle.
Frequently Asked Questions
How long should a 70 year old be able to balance on one foot?
A healthy 70 year old should be able to balance on one foot for at least 10 seconds. Research suggests that adults over 50 who cannot hold one-foot balance for 10 seconds have a significantly higher risk of health issues. For skating specifically, 10 seconds of stationary one-foot balance is the minimum before attempting moving glides.
How to practice one foot glide?
Start with stationary one-foot balance until you can hold each side for 10 seconds. Then do scooter pushes along a straight line, lifting one foot for 2-3 seconds at a time. Build up to extended glides of 5 to 15 seconds. Track your time and direction on each foot to identify imbalances.
Is there a trick to balancing on one foot?
The trick is the Nose-Knee-Toes alignment. Bend your support knee deeply, lean your torso slightly forward so your nose is over your knee, and keep your shoulders level. Tuck your free foot near your support ankle. Fix your alignment first and balance improves immediately.
Why can’t I balance on one foot anymore?
If your one-foot balance has declined, the most common causes are reduced ankle strength, weaker core stabilizers, or a breakdown in alignment habits. Age-related muscle loss can also play a role. Return to stationary one-foot balance drills and off-skate single-leg exercises to rebuild the foundation.
How to balance on one foot on rollerblades?
Bend your support knee, shift all your weight onto that skate, and lift the other foot slowly. Set your nose over your knee and your knee over your toes. Start at a moderate speed because momentum helps stability. Keep your free foot tucked and your shoulders squared forward. Practice on a smooth, flat surface.
Why can’t I do a one foot glide in skating?
Most skaters struggle because their weight is not fully committed to the support skate. Partial weight transfer keeps the free foot wanting to touch down. Other causes include insufficient knee bend, leaning backward, and letting the free leg swing. Run the basic one-foot balance test to identify your specific issue.
Conclusion
One footed glide drills give you a complete picture of your skating balance in under 10 minutes. Run the basic test on both feet, compare the results, and use the symptom-to-cause mapping to identify exactly what needs work.
Remember the three takeaways: fix your Nose-Knee-Toes alignment first, train your weak foot twice as much as your strong one, and progress from static balance before adding speed. Do this consistently and your glide distance, direction control, and skating efficiency will all improve.
Your next step is simple. Grab your skates, find a flat surface, and run the one-foot balance test today. The results will tell you everything you need to know about where your balance stands and what to do next.