
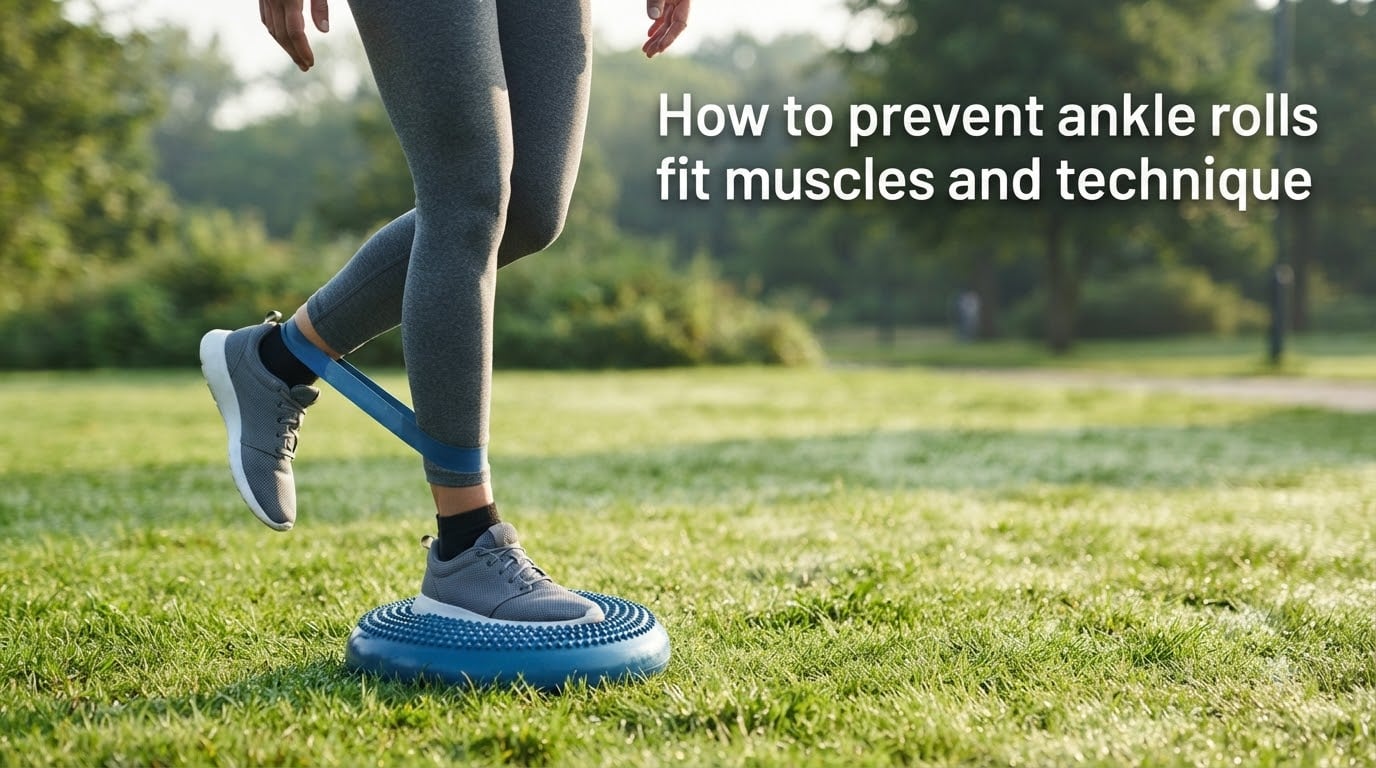
Rolling your ankle once is painful. Rolling it every few weeks is exhausting, confusing, and honestly a little scary. I have spent years working with athletes, runners, and weekend hikers who keep turning the same ankle, and the pattern is almost always the same: weak stabilizer muscles, poor balance awareness, and a body that never fully retrained after the first injury.
The good news is that learning how to prevent ankle rolls comes down to two things: fitting the right muscles and refining your technique. You do not need expensive gear or months of physical therapy to see results. Most people notice a real difference within four to six weeks of consistent training.
In this guide, I will walk you through what actually happens when your ankle rolls, the specific muscles that keep it stable, and a step-by-step program you can start today. I will also cover sport-specific tips, taping basics, and how to safely return to activity after a sprain.
Table of Contents
What Happens When Your Ankle Rolls?
An ankle roll, technically called an inversion sprain, happens when your foot turns inward beyond its normal range. This sudden movement stretches or tears the ligaments on the outside of your ankle. The most commonly injured ligament is the anterior talofibular ligament, or ATFL, a thin band of tissue that limits forward and inward movement of the foot.
When the ATFL and its neighboring ligaments stretch too far, the nerves around them get damaged too. This is where things get interesting from a prevention standpoint, because those nerves are what tell your brain where your ankle is in space. Damage them once and your proprioception, your body’s position sense, drops significantly.
About 80 percent of all ankle sprains are inversion injuries. The remaining 20 percent involve the foot rolling outward, which affects a different set of ligaments and tends to be less common but sometimes more serious.
Why You Keep Rolling the Same Ankle
If you feel like once you roll an ankle, it keeps happening, you are not imagining it. The research is clear on this: a single ankle sprain roughly triples your risk of future sprains. This cycle is called chronic ankle instability, and it has three main drivers.
First, the ligaments themselves heal in a stretched, lengthened position. Unlike muscle tissue, ligaments have poor blood supply and do not snap back to their original tension after being overstretched. The ATFL in particular tends to heal loose, leaving the joint mechanically less stable.
Second, proprioception does not automatically return after healing. Your ankle may feel fine, but your nervous system is slower to detect dangerous positions and react. Studies show that people with prior sprains have measurable delays in muscle reaction time, sometimes lasting months or years.
Third, the peroneal muscles that should fire to pull your foot back into a safe position become weak and slow to activate. It is a combination of mechanical looseness, sensory deficit, and muscular weakness, and all three need to be addressed.
Some people also have naturally loose joints due to generalized ligament laxity or conditions like hypermobility spectrum disorders. If your fingers bend backward easily or your knees hyperextend, your ankles may be more prone to rolling even without a prior injury.
Key Muscles That Prevent Ankle Rolls
Preventing ankle rolls is not just about the ankle itself. Stability comes from a chain of muscles working together from the hip down to the toes. Here are the four muscle groups that matter most.
Peroneal Muscles (Fibularis Longus and Brevis)
These are your primary ankle stabilizers. They run along the outside of your lower leg and attach to the foot, and their main job is to pull the foot outward, resisting the inward roll. When they are strong and quick to fire, they act like active seatbelts that catch your ankle before it goes too far.
The peroneals are the single most important muscle group for ankle roll prevention. Every exercise program should start here.
Calves (Gastrocnemius and Soleus)
Your calf muscles control ankle positioning during walking, running, and jumping. The gastrocnemius handles explosive push-off, while the soleus manages posture and endurance. Tight calves pull the foot into a downward-pointing position, which increases inversion risk on uneven ground.
Strong, flexible calves give you a stable base. Tight, weak ones leave the ankle vulnerable.
Hip Abductors and Gluteus Medius
This is the connection most people miss. When your gluteus medius is weak, your knee collapses inward during walking and running. That inward knee collapse forces the foot to roll inward too, transferring instability all the way down to the ankle.
Forum runners and hikers who fixed chronic ankle rolls often credit hip strengthening as the missing piece. As one physical therapist I worked with puts it, the ankle is just the last link in a chain that starts at the hip.
Intrinsic Foot Muscles
The small muscles inside your foot control arch height and toe positioning. A strong foot arch acts as a shock absorber and a stabilizer. Weak foot muscles let the arch collapse, which promotes the inward rolling pattern.
Think of your foot as the foundation of a building. If the foundation shifts, everything above it compensates, and the ankle joint takes the brunt.
Strengthening Exercises to Prevent Ankle Rolls
Here is a practical routine you can do three times per week. Each exercise targets a specific muscle group in the stability chain. Start with body weight and add resistance bands or weights as the movements become easy.
1. Resistance Band Eversions (Peroneals)
This is the single most targeted exercise for ankle roll prevention.
Sit on the floor with your legs straight. Loop a resistance band around the ball of one foot and anchor the other end to a sturdy object on the opposite side of your body. Slowly pull your foot outward against the band, then return to the starting position with control.
Do 3 sets of 15 repetitions per side. Hold each repetition at the top for one second. You should feel the burn along the outside of your lower leg.
2. Calf Raises and Heel Raises (Gastrocnemius and Soleus)
Stand near a wall for balance. Rise onto the balls of your feet as high as possible, hold for two seconds, then lower slowly over three seconds.
Do 3 sets of 20 repetitions. To target the soleus, perform the same movement seated with your knees bent at 90 degrees, which removes the gastrocnemius from the movement.
3. Single-Leg Balance Progressions (Proprioception)
Stand on one foot with your eyes open for 30 seconds. When that feels easy, close your eyes. When that feels easy, stand on a folded towel or a balance pad to introduce instability.
Progress to single-leg reaches, where you stand on one foot and reach the other foot forward, sideways, and backward. This trains your ankle to react to shifting weight, which is exactly what it needs to do on trails and courts.
Do 3 sets of 30 seconds per side at your current progression level.
4. Lateral Band Walks (Hip Abductors)
Place a small resistance band around your ankles. Stand in a quarter squat with feet shoulder-width apart. Take 10 steps to the right, maintaining tension on the band, then 10 steps to the left.
Do 3 sets. You should feel the burn on the outside of your hips, not your knees.
5. Short Foot Exercise (Intrinsic Foot Muscles)
Sit in a chair with your bare foot flat on the floor. Without curling your toes, draw the ball of your foot toward your heel to lift your arch. Hold for 5 seconds, relax, and repeat.
Do 3 sets of 10 repetitions per foot. This exercise looks subtle but builds the arch support that protects your ankle from the ground up.
Balance and Proprioception Training
Balance training is where prevention really clicks for most people. After an ankle sprain, your joint position sense, the internal GPS that tells your brain where your foot is, becomes sluggish. The only way to rebuild it is through targeted practice.
Proprioception training works by forcing your nervous system to make constant micro-adjustments. Each tiny correction strengthens the neural pathways between your ankle, your spinal cord, and your brain.
Here is a four-week progression I have used with runners and basketball players:
Week 1: Single-leg balance on a flat surface, eyes open, 30 seconds per side, twice daily.
Week 2: Same exercise with eyes closed, or on a folded towel.
Week 3: Single-leg balance on a balance board, BOSU ball, or wobble cushion for 30 seconds per side.
Week 4: Single-leg balance while tossing a ball against a wall or turning your head side to side.
The key is progressive overload. If an exercise feels easy, it is time to add instability. Your ankle only gets better at reacting when it is forced to react.
Warm-Up and Mobility Routine
A good warm-up prepares your nervous system, not just your muscles. Spend 5 to 10 minutes before any activity doing dynamic movements rather than static stretches.
Start with ankle circles: 10 rotations in each direction per ankle. Follow with calf wall stretches, holding each side for 20 to 30 seconds to improve dorsiflexion range. Tight calves limit how far your shin can travel over your foot, which forces compensations that increase roll risk.
Finish with 20 heel walks and 20 toe walks across a room. Heel walks strengthen the muscles that lift the foot, while toe walks engage the calves and intrinsic foot muscles. Both prime your ankle for the demands of running or jumping.
Avoid static stretching as your primary warm-up. Save longer holds for after your activity, when your muscles are warm and receptive.
Taping and Bracing Techniques
Taping and bracing can reduce sprain risk, but they work best as a temporary bridge while you build permanent strength. Research published by the NIH shows that bracing can cut sprain recurrence rates significantly in athletes with prior injuries.
Taping typically uses rigid sports tape applied in a figure-eight or stirrup pattern to limit excessive inversion. The main drawback is that tape loosens after about 20 to 30 minutes of activity and needs to be reapplied by someone who knows the technique.
Bracing is more convenient and reusable. Lace-up braces and semi-rigid braces both limit inversion while allowing forward and backward movement. For athletes returning from a sprain, a brace is a smart safeguard during the first few weeks back.
Here is the catch that physical therapists emphasize: braces and tape should supplement your training, not replace it. If you rely on external support indefinitely, your stabilizer muscles never learn to fire on their own. The goal is to wean off support as your strength and proprioception improve.
A common progression is to use a brace for the first month of return to sport, then switch to tape for high-risk games, then eventually train without any support once balance and strength tests are passed.
Sport-Specific Prevention Tips
Different sports stress your ankles in different ways. Here is how to adapt your prevention strategy.
Basketball and Volleyball
Jumping and landing on other players’ feet is the number one cause of ankle rolls in court sports. Practice landing mechanics: knees over toes, soft knees, weight distributed evenly across both feet. Single-leg landing drills build the reactive strength you need when you come down on an uneven surface.
Many competitive players wear braces during every game, even without prior injuries, because the risk is simply higher on a crowded court.
Trail Running and Hiking
Uneven terrain is the enemy of ankle stability. Focus on proprioception training on unstable surfaces to mimic trail conditions. Choose shoes with a wider base and lower stack height, since tall, narrow cushioning can act like a lever that tips your foot.
Trail runners on community forums consistently report that thinner, firmer shoes reduce their roll frequency compared to thick, plush designs, because they can feel the ground and react faster.
Soccer, Tennis, and Other Change-of-Direction Sports
These sports demand rapid lateral cuts that stress the ankle from every angle. Hip strengthening is especially important here, because weak hips cause the knee-to-ankle collapse chain mentioned earlier. Add agility ladder drills and cone changes of direction to your weekly routine.
Warm up thoroughly before competitive play. Cold ankles are slow ankles.
Returning to Activity After an Ankle Roll
Coming back too fast is the most common mistake people make. Pain fading does not mean the ankle is ready for full activity. Here is a phased approach based on standard return-to-sport protocols.
Phase 1 (Days 1 to 5): Rest, ice, compression, and elevation. Gentle range-of-motion exercises like ankle alphabet tracing start on day 2 or 3 once acute pain subsides.
Phase 2 (Days 5 to 14): Begin strengthening with resistance band eversions and seated calf raises. Add single-leg balance on a stable surface. Pain should stay below a 3 out of 10 during and after exercise.
Phase 3 (Weeks 2 to 4): Progress to standing calf raises, balance on unstable surfaces, and light jogging if you can walk pain-free. Continue hip strengthening.
Phase 4 (Weeks 4 to 6): Introduce sport-specific drills, cutting movements, and jumping. Use a brace during this phase for extra confidence.
Before full return, you should be able to balance on the injured leg for 30 seconds with eyes closed, hop in place 10 times without pain, and run and cut without hesitation or favoring the ankle. If you cannot do these, you are not ready.
See a doctor or physical therapist if you cannot bear weight after 48 hours, if there is visible deformity, if numbness or tingling persists, or if instability continues beyond six weeks despite training. Chronic ankle instability sometimes requires structured rehabilitation or, in rare cases, surgical reconstruction.
Frequently Asked Questions
How do I stop my ankle from rolling inwards?
Strengthen your peroneal muscles with resistance band eversions, train balance with single-leg progressions, and stretch tight calves daily. If you have a history of sprains, add hip strengthening exercises because weak glutes contribute to inward foot collapse. Most people see results within four to six weeks of consistent training three times per week.
Why am I so prone to rolling my ankle?
Repeated ankle rolls come from three factors: ligaments that healed in a stretched position after a prior sprain, reduced proprioception that makes your body slow to react, and weak peroneal muscles that should catch the ankle before it goes too far. Generalized ligament laxity or hypermobility can also make some people naturally more prone.
Will a rolled ankle ever fully heal?
Yes, most rolled ankles heal fully with proper rehabilitation, but healing requires more than just rest. You need to rebuild strength, proprioception, and flexibility through targeted exercises. Without rehab, up to 70 percent of people develop chronic ankle instability and keep re-injuring the same joint.
Can you become immune to ankle sprains?
Complete immunity is not possible, but you can dramatically reduce your risk. Studies show that combining peroneal strengthening, proprioception training, and proper warm-up routines can cut sprain rates by more than half in athletes with prior injuries. Consistency is the key factor.
Conclusion
Learning how to prevent ankle rolls is a process of fitting the right muscles and refining your technique. It starts with understanding that ankle stability comes from a chain of muscles spanning from your hip to your foot, not just the joint itself. It continues with a consistent routine of peroneal strengthening, balance training, calf work, and hip activation.
You do not need to accept weak ankles as a permanent condition. The exercises in this guide, done three times a week, can rebuild the strength and proprioception that protect you on trails, courts, and everyday terrain. Start where you are, progress gradually, and give your body the four to six weeks it needs to show real change.
If you are recovering from a recent sprain, follow the phased return-to-activity timeline and do not rush back before you pass the balance and hop tests. Your future self will thank you for the patience.